

Learn how to clean collard greens the right way with this step-by-step guide designed for beginner home cooks—because nobody wants to bite into gritty, sandy, or “crunchy” greens.
From soaking and swishing to drying them properly, this post will help you confidently remove dirt, bugs, and tough surprises hiding in your leafy greens, so you’re left with tender, flavorful collards ready for your favorite soul food recipes.
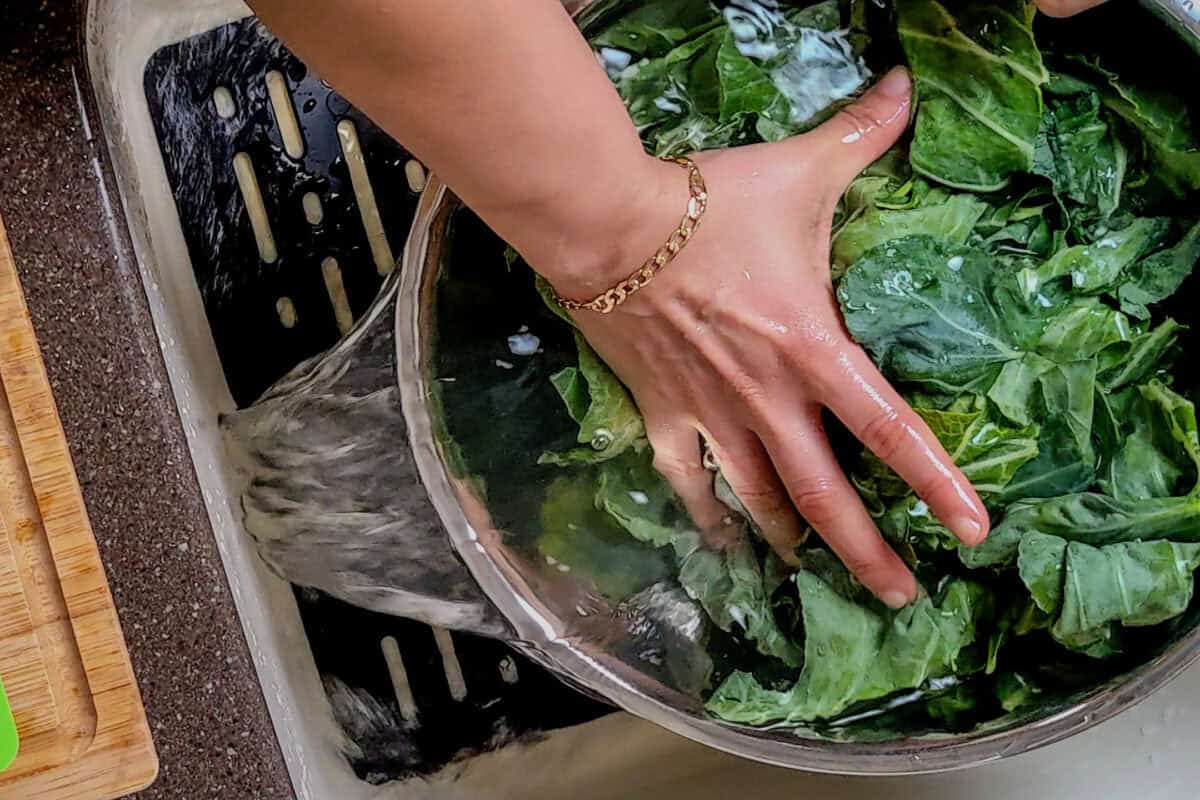
Table of Contents
Jump to:
- Why Cleaning Collard Greens Is a Must
- News to Me!
- Explore. Experiment. Taste. Right?!
- Choosing the Best Collard Greens
- Again, Clean Your Greens
- Quick Culinary Glossary
- Step-by-Step Instructions with Pictures
- Adding Vinegar
- Equipment
- Storing After Prep
- Prepping Tips Recap
- Frequently Asked Questions
- Cook's Notebook
- Trending Recipes
- Subscribe to the YouTube Channel
- Have a Comment or Question?
Why Cleaning Collard Greens Is a Must
Collard greens are delicious, hearty, and loaded with nutrients—but let’s be real: they grow low to the ground and often come with a little extra… texture. I'm talking about sand, grit, and sometimes even a surprise bug or two (yep, I said it). That’s why learning how to clean collard greens properly is essential.
A quick rinse just won’t cut it—these leafy greens need a full-on spa treatment and love to ensure your dish is all flavor and zero dirt. Whether you're simmering them down with smoked meat or going for a vegan twist, clean greens are the foundation of a good pot, and I'll show you why.
News to Me!

And let me be honest with you—I didn’t grow up eating collard greens. My mom, who was born in the Bahamas and is of Haitian descent, cooked mostly Haitian dishes like stewed chicken, rice and beans, and boiled plantains. Collards? Not on the menu.
The Introduction
It wasn’t until I was an adolescent that collard greens started making their way to our Thanksgiving table. My mom began working closely with more "Black Americans"—what many Haitians call African Americans who don’t have Caribbean ancestry—and she started learning traditional Southern-style recipes. That’s when collard greens officially entered our repertoire.
My Turn
Fast forward to adulthood, and suddenly, it was my turn to make the collard greens for Thanksgiving. I panicked! Because I didn’t grow up learning how to clean or prep them, so I hit the internet hard—watching videos, reading blogs, anything to get it right. So, I couldn’t help but feel like I was late to the party (like always).
As a Black woman, I wondered, “Am I the only one who didn’t grow up with this?” For a hot second, I thought I lost points on my Black card for not knowing how to clean collard greens—especially considering their deep roots in African American culture.
But then I remembered people talking about cooking leafy greens on the islands too—they called it callaloo or lalo.
Other Greens
With that said, I grew up watching my grandma and mom cook soups or simple stewed greens using ingredients like spinach and watercress, always adding a little extra just for me because they knew I actually loved my greens—even if they weren’t collards at the time.
Explore. Experiment. Taste. Right?!
Learning how to clean collard greens felt like a rite of passage for me. An initiation into a wider cultural kitchen that I hadn’t yet stepped into. And now? I’m proud to pass on what I’ve learned to anyone who’s ever stared down a gritty bundle of collards, wondering where to start.
What Are Callaloo and Haitian Lalo?
In case you were wondering, while collard greens are deeply rooted in African American cuisine, other parts of the African diaspora have their own versions of stewed leafy greens.
The Caribbeans
In many Caribbean islands, especially Jamaica and Trinidad, callaloo refers to a dish made with leafy greens like amaranth leaves, taro leaves, or sometimes even spinach, cooked down with onions, peppers, garlic, thyme, and often coconut milk or salted meat. It’s rich, flavorful, and varies from island to island.
Haitian Cuisine
In Haitian cuisine, a similar dish exists called lalo, which is traditionally made with jute leaves. Lalo is slow-cooked with epis (Haitian seasoning), blue crab, or beef and often served with white rice.

The texture is different from collards—lalo tends to be more slippery due to the nature of the jute leaves—but it holds the same cultural weight and comfort-food status in Haitian households. Check out this recipe using Lalo from Love for Haitian Food.
So, while I didn’t grow up with collard greens, I did grow up with leafy green stews that served the same purpose: nourishing the body and soul, passed down through generations. Do you have a story to share? Please do! I would love to hear it. Alright, so let's get into learning how to clean collard greens.
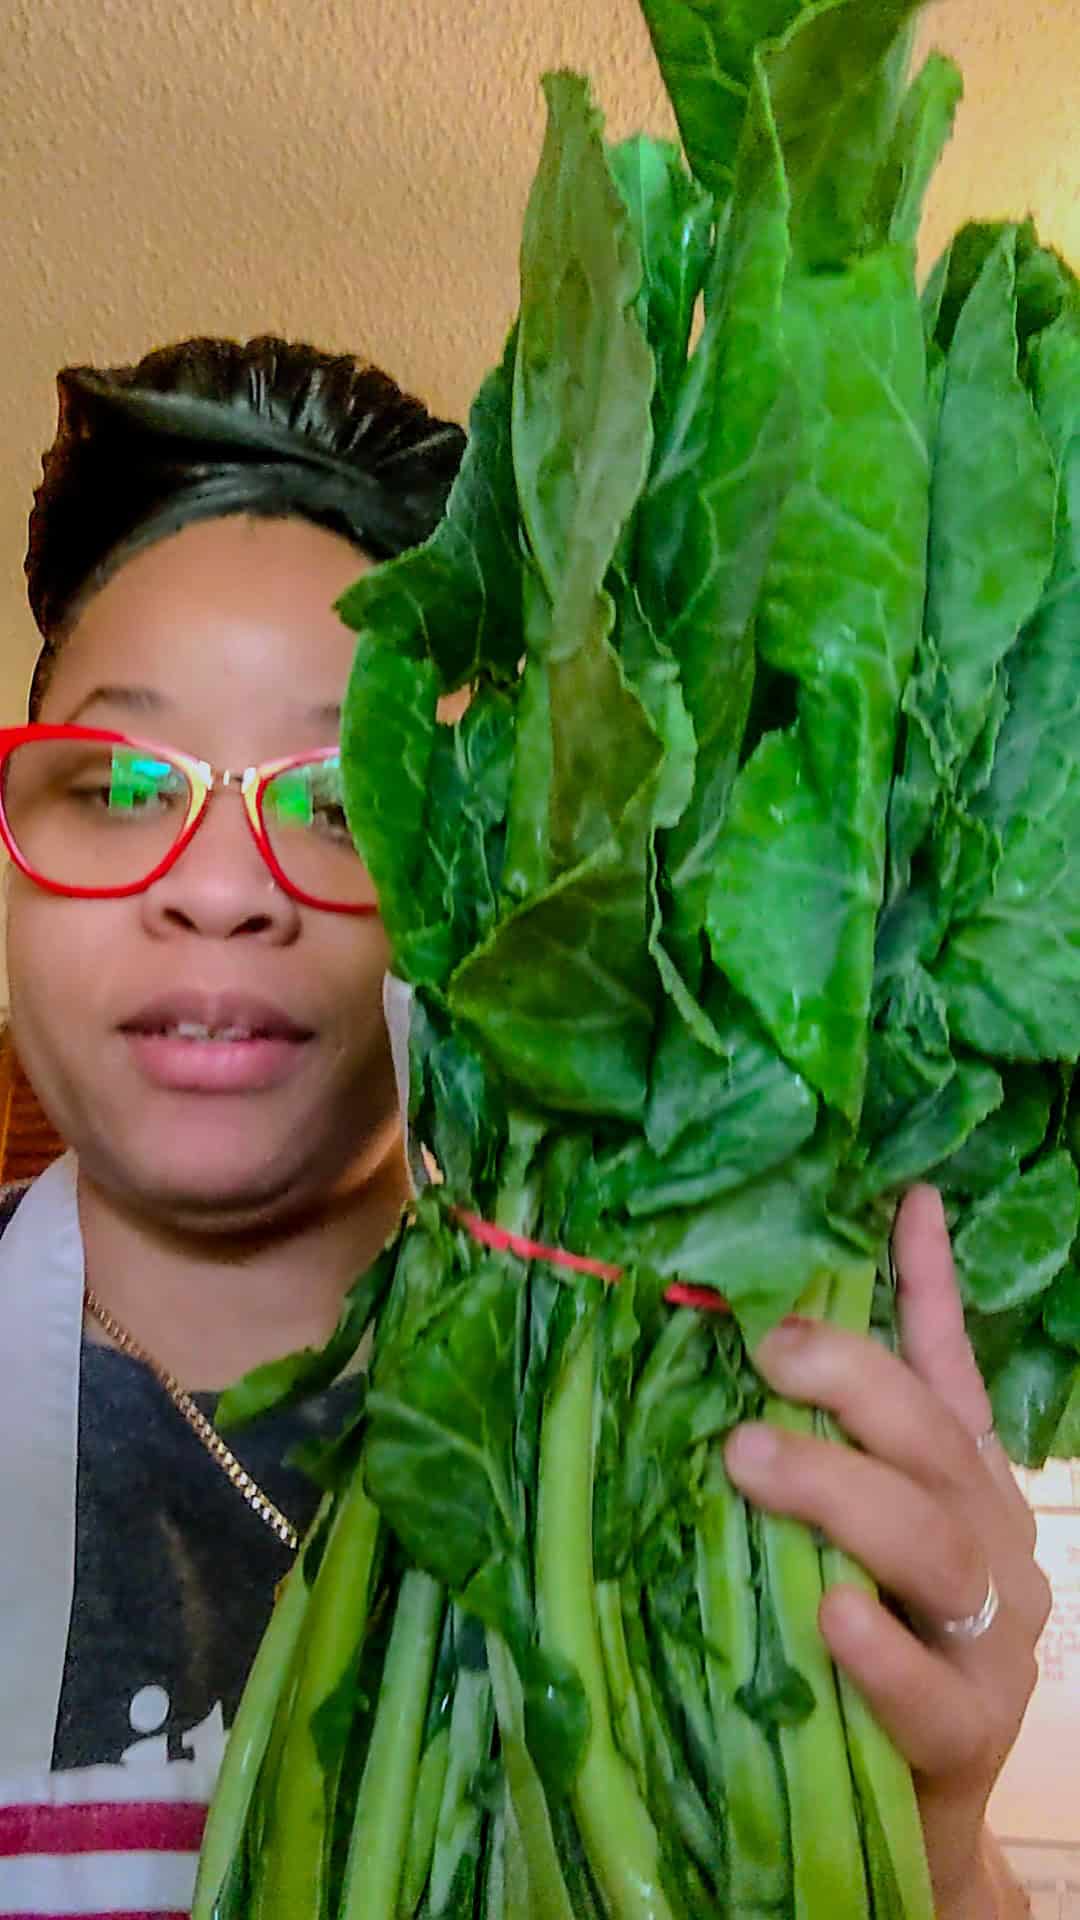
Choosing the Best Collard Greens
Before you even think about cooking collard greens, you’ve got to start with the right ones. Choosing the best bunch of greens is a crucial step in the cooking process that affects everything—from how long they take to cook to the final flavor of the greens in your pot.
Whether you’re prepping for a holiday feast like New Year’s Day or just want a perfect side dish for your weeknight dinner, starting with fresh, vibrant greens is the best way to get that soul-satisfying result.
Here are some quick tips I always follow (and trust me, after enough years of watching my grandma, mom, and every Southern cook I admire—I know they work):
1. Choose smaller leaves for milder flavor and faster cooking.
Smaller collard leaves tend to have a sweeter, less bitter taste, and they break down faster, which is great if you're not planning a long cooking session with ham hocks or smoked turkey. They’re especially helpful for newer cooks who want tender, flavorful results without waiting forever.
2. Look for crisp, sturdy leaves with prominent veins and no wilting.
You want your collard leaves to stand up straight and firm, not flop over the second you touch them. Sturdy leaves hold up better during the cooking process whether you're braising them with chicken broth, simmering in pot likker, or sautéing over medium-high heat with a dash of soy sauce and red pepper flakes for a modern twist.
3. Avoid bunches with dry, cracked stems, yellowing, or lots of holes.
A few bug bites are fine (especially at the farmers market), but you want to avoid leaves with deep tears, excess moisture, or damaged, tough stems. Dry or cracked thick central ribs usually mean the greens were picked a long time ago and have lost some of their nutrition and texture.
Chef's Tip
I like to pick up a few types of leafy greens when I shop—sometimes, I’ll mix in mustard greens, turnip greens, or even Swiss chard for a unique flavor blend that still falls under that comforting Southern-style collard greens category.
And if you’re wondering—yes, they all taste amazing with a splash of apple cider vinegar, a pinch of black pepper, or even a tablespoon of sugar to mellow out the bitterness.
Again, Clean Your Greens
Once you’ve picked out your fresh greens, be sure to give them a good rinse before anything else. No, you don’t need to toss them in a washing machine (although I’ve seen jokes about it online)—a bowl of cold water or even warm water in your sink will do the trick.
Some folks even add a little white vinegar to help loosen up dirt and reduce bacteria before drying them off with a moist paper towel or a quick spin in their salad spinners.
After that? It’s just you, your cutting board, a sharp knife, and the start of some seriously nutritious collard greens magic.
What do you want to learn next?
- Scotch Bonnet Smoked Turkey Collard Greens Beans Soup
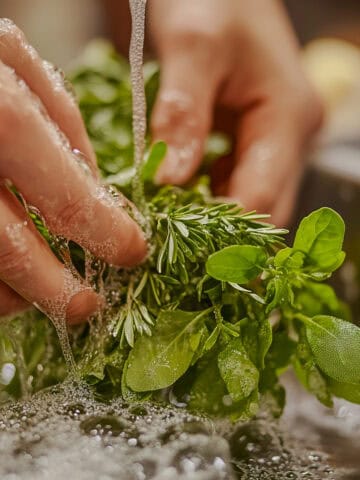
- Prepping Herbs
- Green Seasoning Recipe | Epis - Haitian Style
- Air Fryer Roasted Harissa Salmon with Paprika Potatoes
- Tips on How to Prepare and Cook Mushrooms
Quick Culinary Glossary
This section concisely defines key ingredients and techniques related to this tutorial to enhance understanding and improve cooking skills.
- Collard Greens - A dark leafy green vegetable with thick central ribs and fanlike leaves, part of the cruciferous vegetable family. Known for their bold flavor and prominent role in Southern cuisine.
- Cruciferous Vegetables - A category of vegetables that includes collard greens, kale, mustard greens, cabbage, and Brussels sprouts. These are cool-season crops packed with fiber, vitamins, and health benefits.
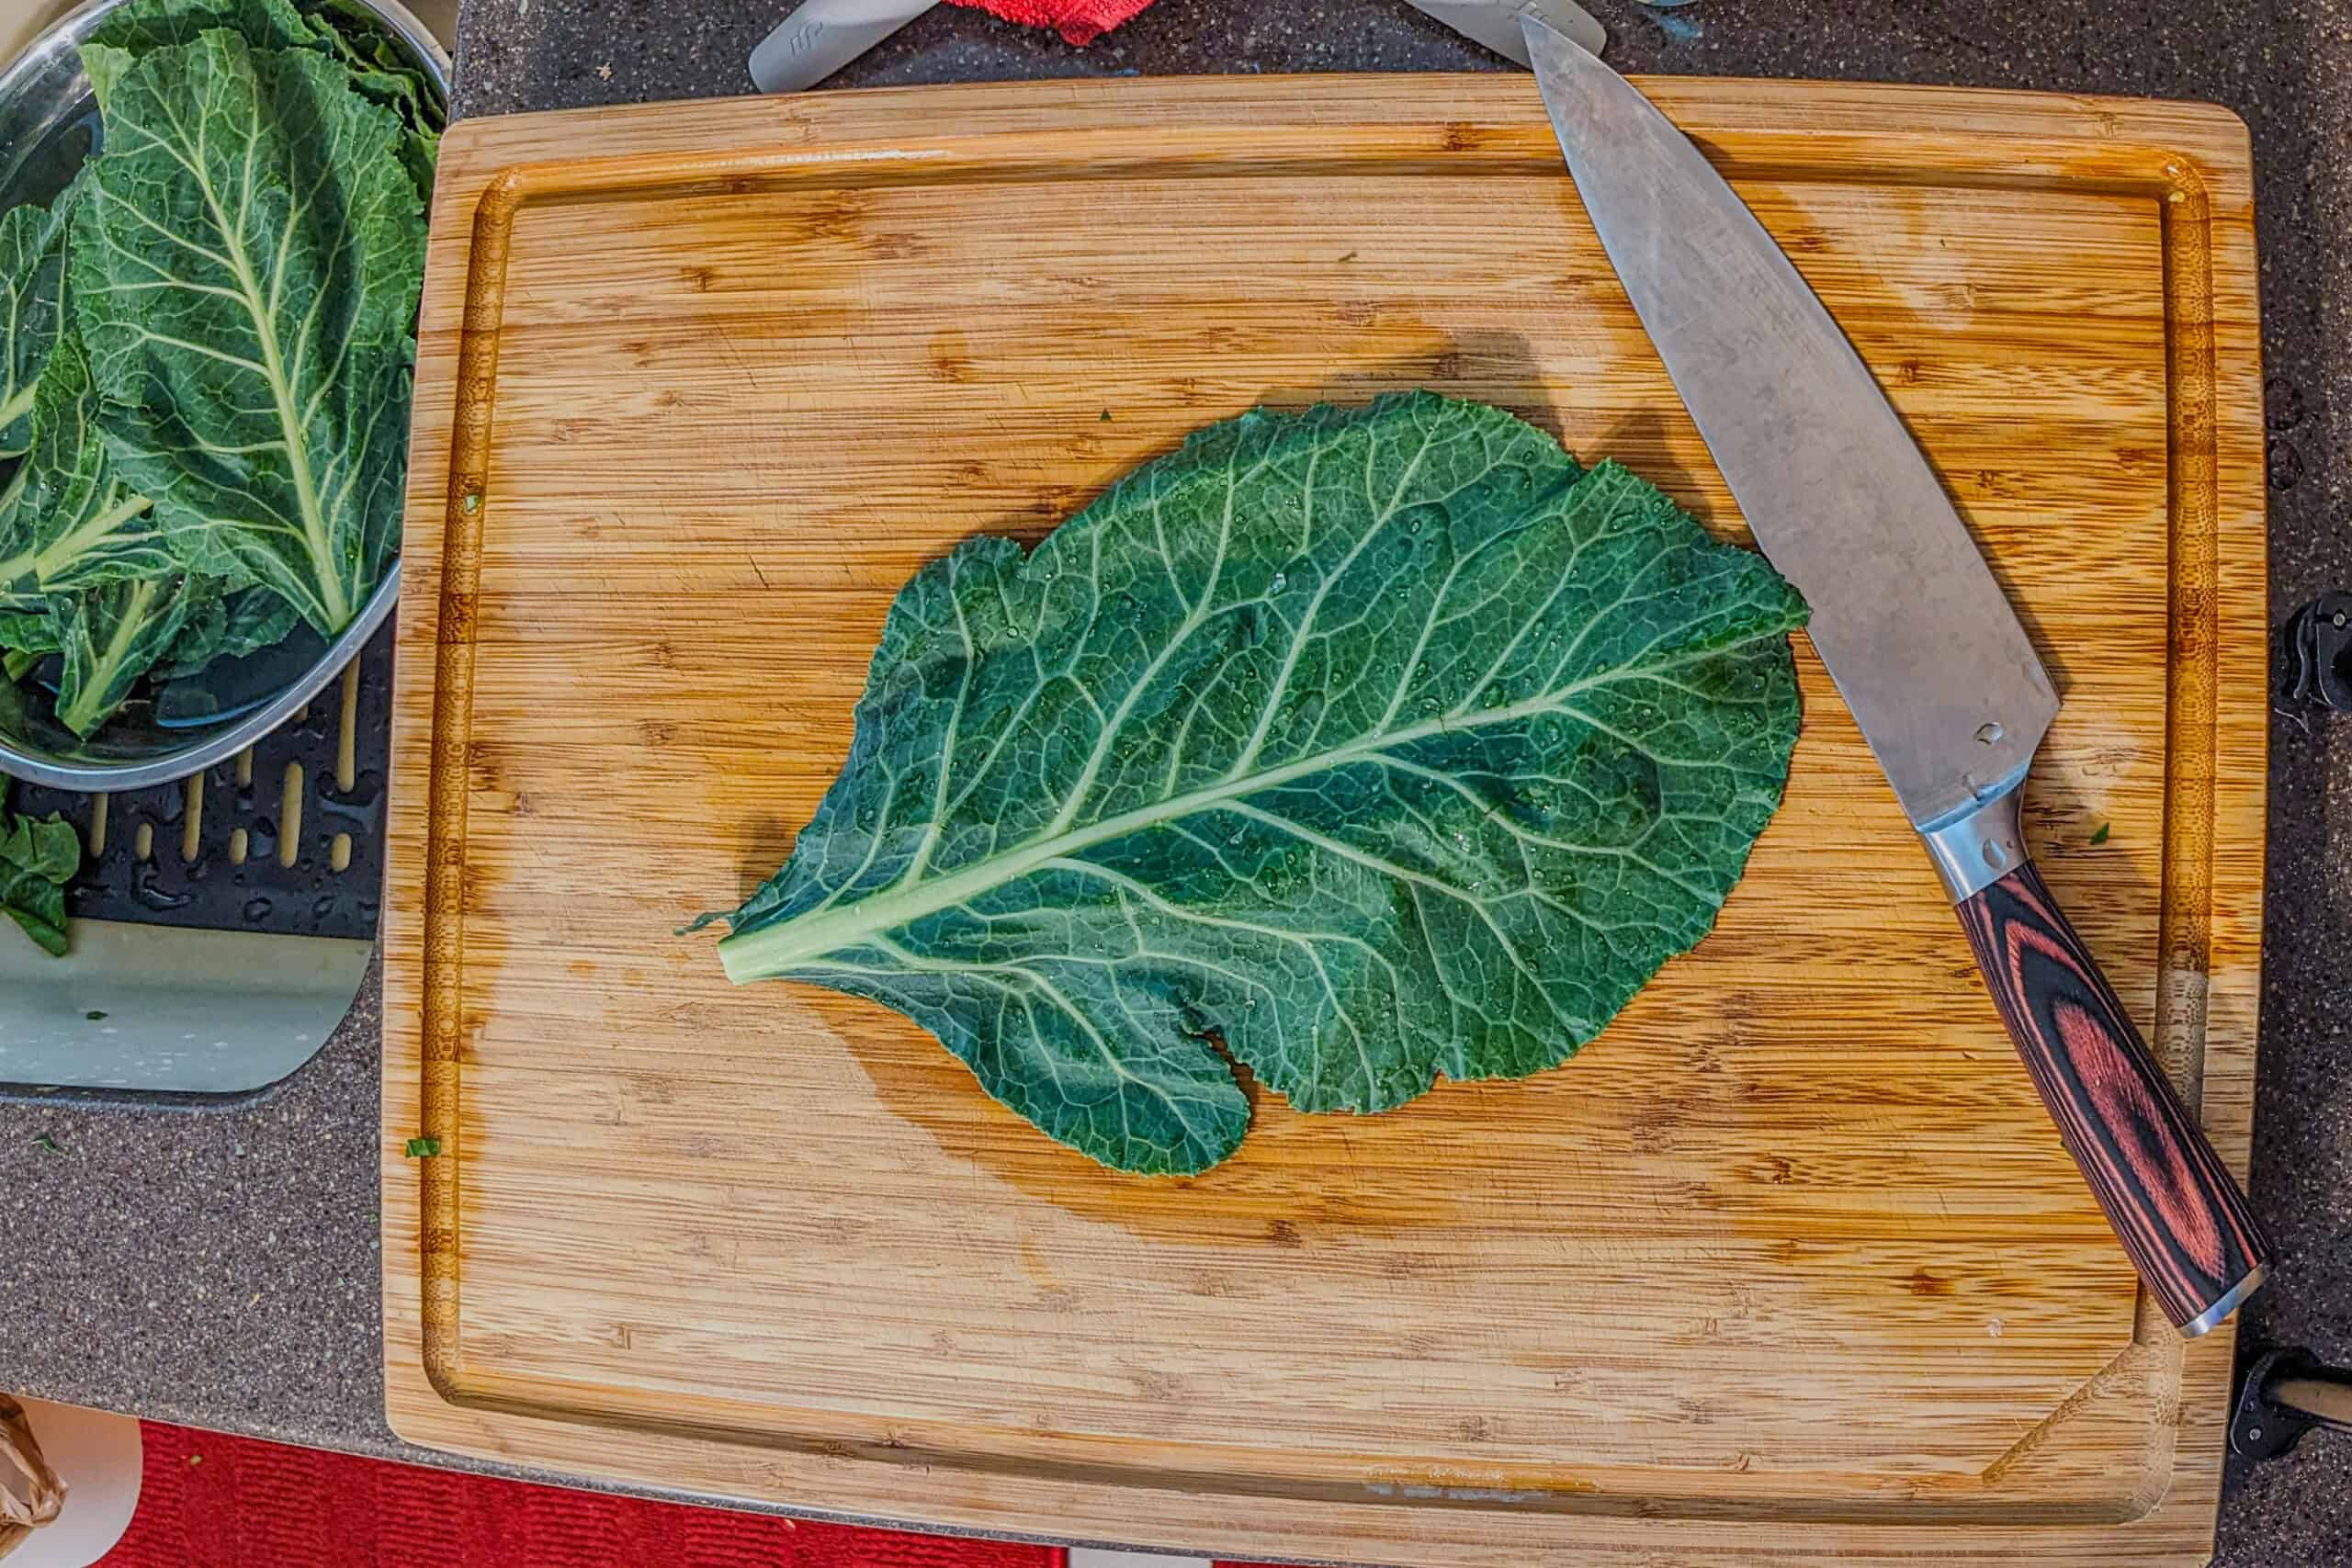
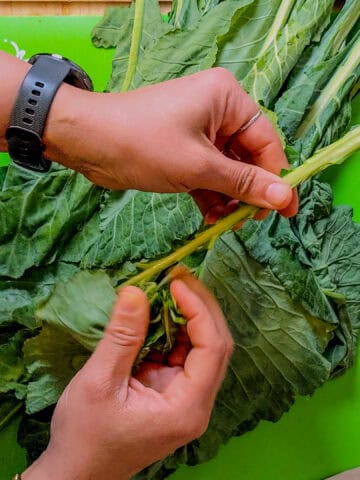
- Tough Stem (Thick Central Rib) - The hard, fibrous middle stem of collard greens that runs down the center of each leaf. It must be removed before cooking to avoid a chewy texture.
- Good Rinse - A thorough method of cleaning leafy greens in cold or warm water—often repeated multiple times to remove grit, dirt, and sand. This is a crucial step in preparing collards properly.
- Bowl of Cold Water - A large bowl filled with cold water used for soaking collard greens. Swishing the leaves in cold water helps dislodge grit and dirt without wilting the greens.
- Moist Paper Towel - A damp paper towel is used to pat dry, cleaned collard greens. It helps reduce excess moisture before trimming and slicing, ensuring safer handling and better texture during cooking.
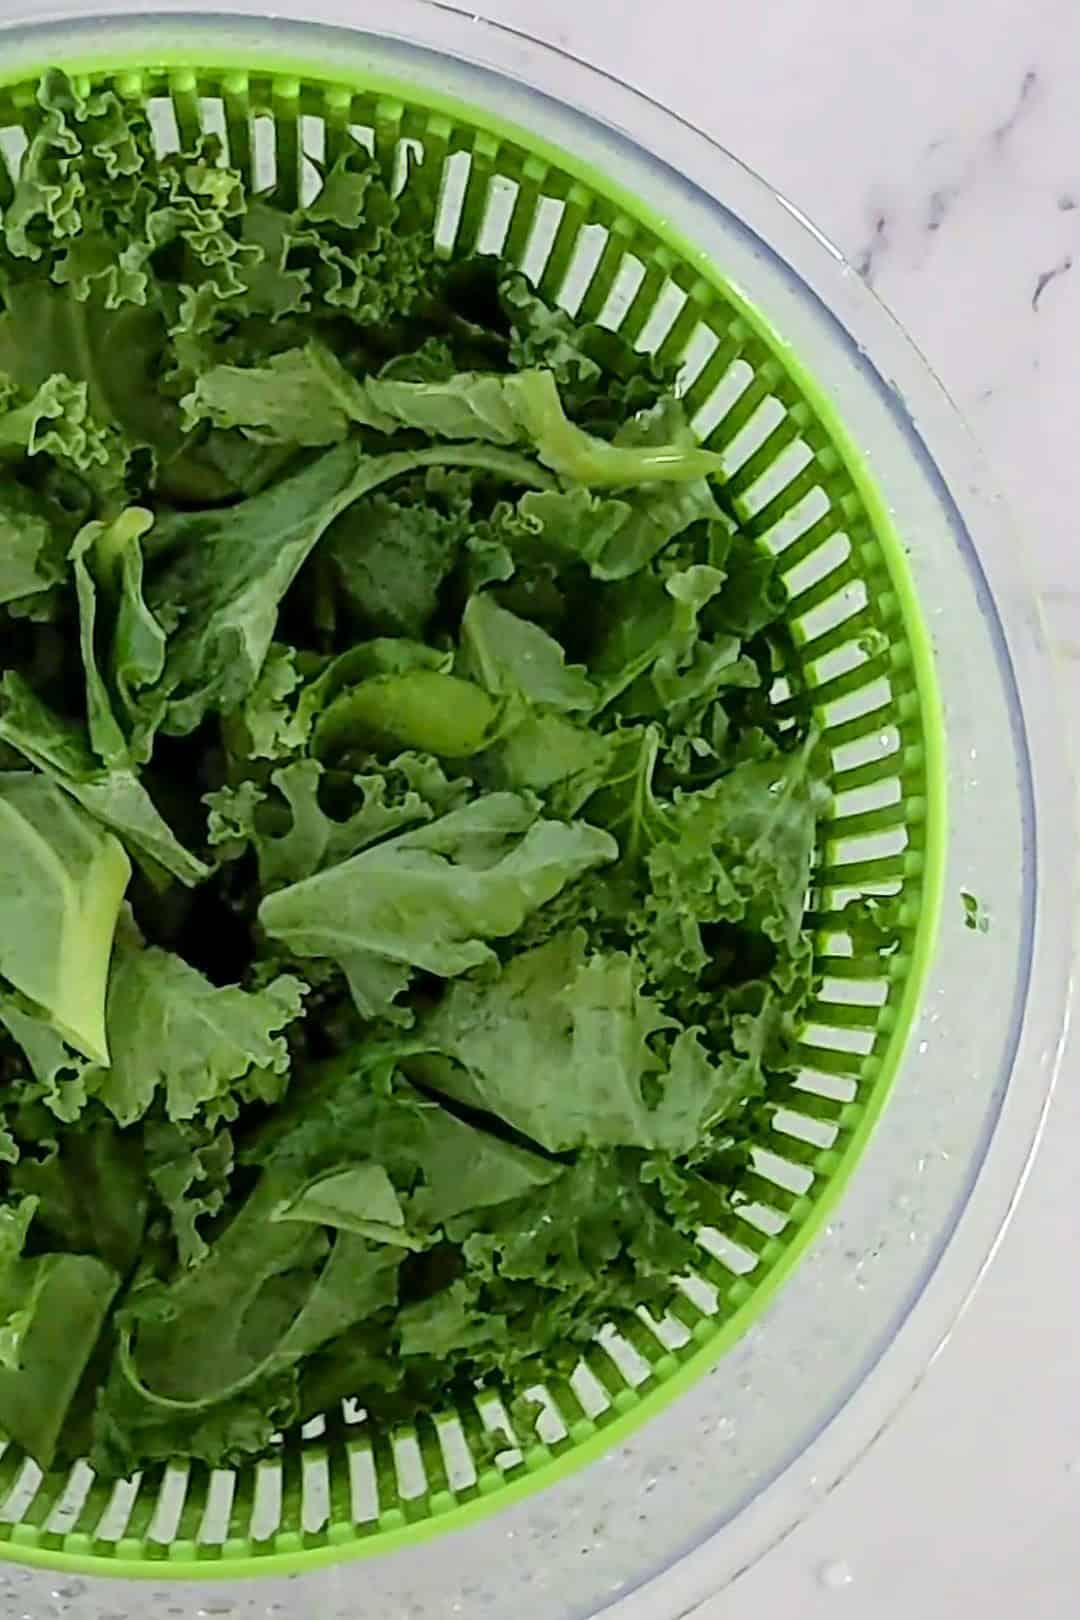
- Salad Spinner - A kitchen tool used to remove excess moisture from leafy greens after washing. Helpful when preparing collard greens for quicker drying without bruising the leaves.
- Prominent Veins - The noticeable lines running through collard green leaves, part of the leaf’s structure. These are more visible in larger leaves and help determine how tough the green will be.
- Fresh Greens - Recently harvested, vibrant, leafy greens with crisp leaves and minimal blemishes. Starting with fresh greens ensures better flavor and texture when cooked.
My Rating: ⭐⭐⭐⭐
Purchased: 03/28/22
Update: 01/15/2025
My Review: Cuisinart is a renowned brand known for its innovative, high-quality kitchen appliances and tools that make cooking and food prep effortless. Additionally, the Cuisinart Salad Spinner has been a trusty tool in my kitchen for years, and it’s proven to be so much more than just a salad spinner! Despite its compact size, it handles everything with ease—from rinsing and drying delicate herbs to cleaning mushrooms and, of course, prepping perfectly dry greens for salads. Its durable design has stood the test of time, and its efficiency has made meal prep so much quicker and easier. If you’re looking for a versatile, long-lasting kitchen tool, this little spinner is a must-have! I've made a post about it, check out my salad spinner post here.
Step-by-Step Instructions with Pictures
Follow the instructions and prepping tips below using the step-by-step picture guide.
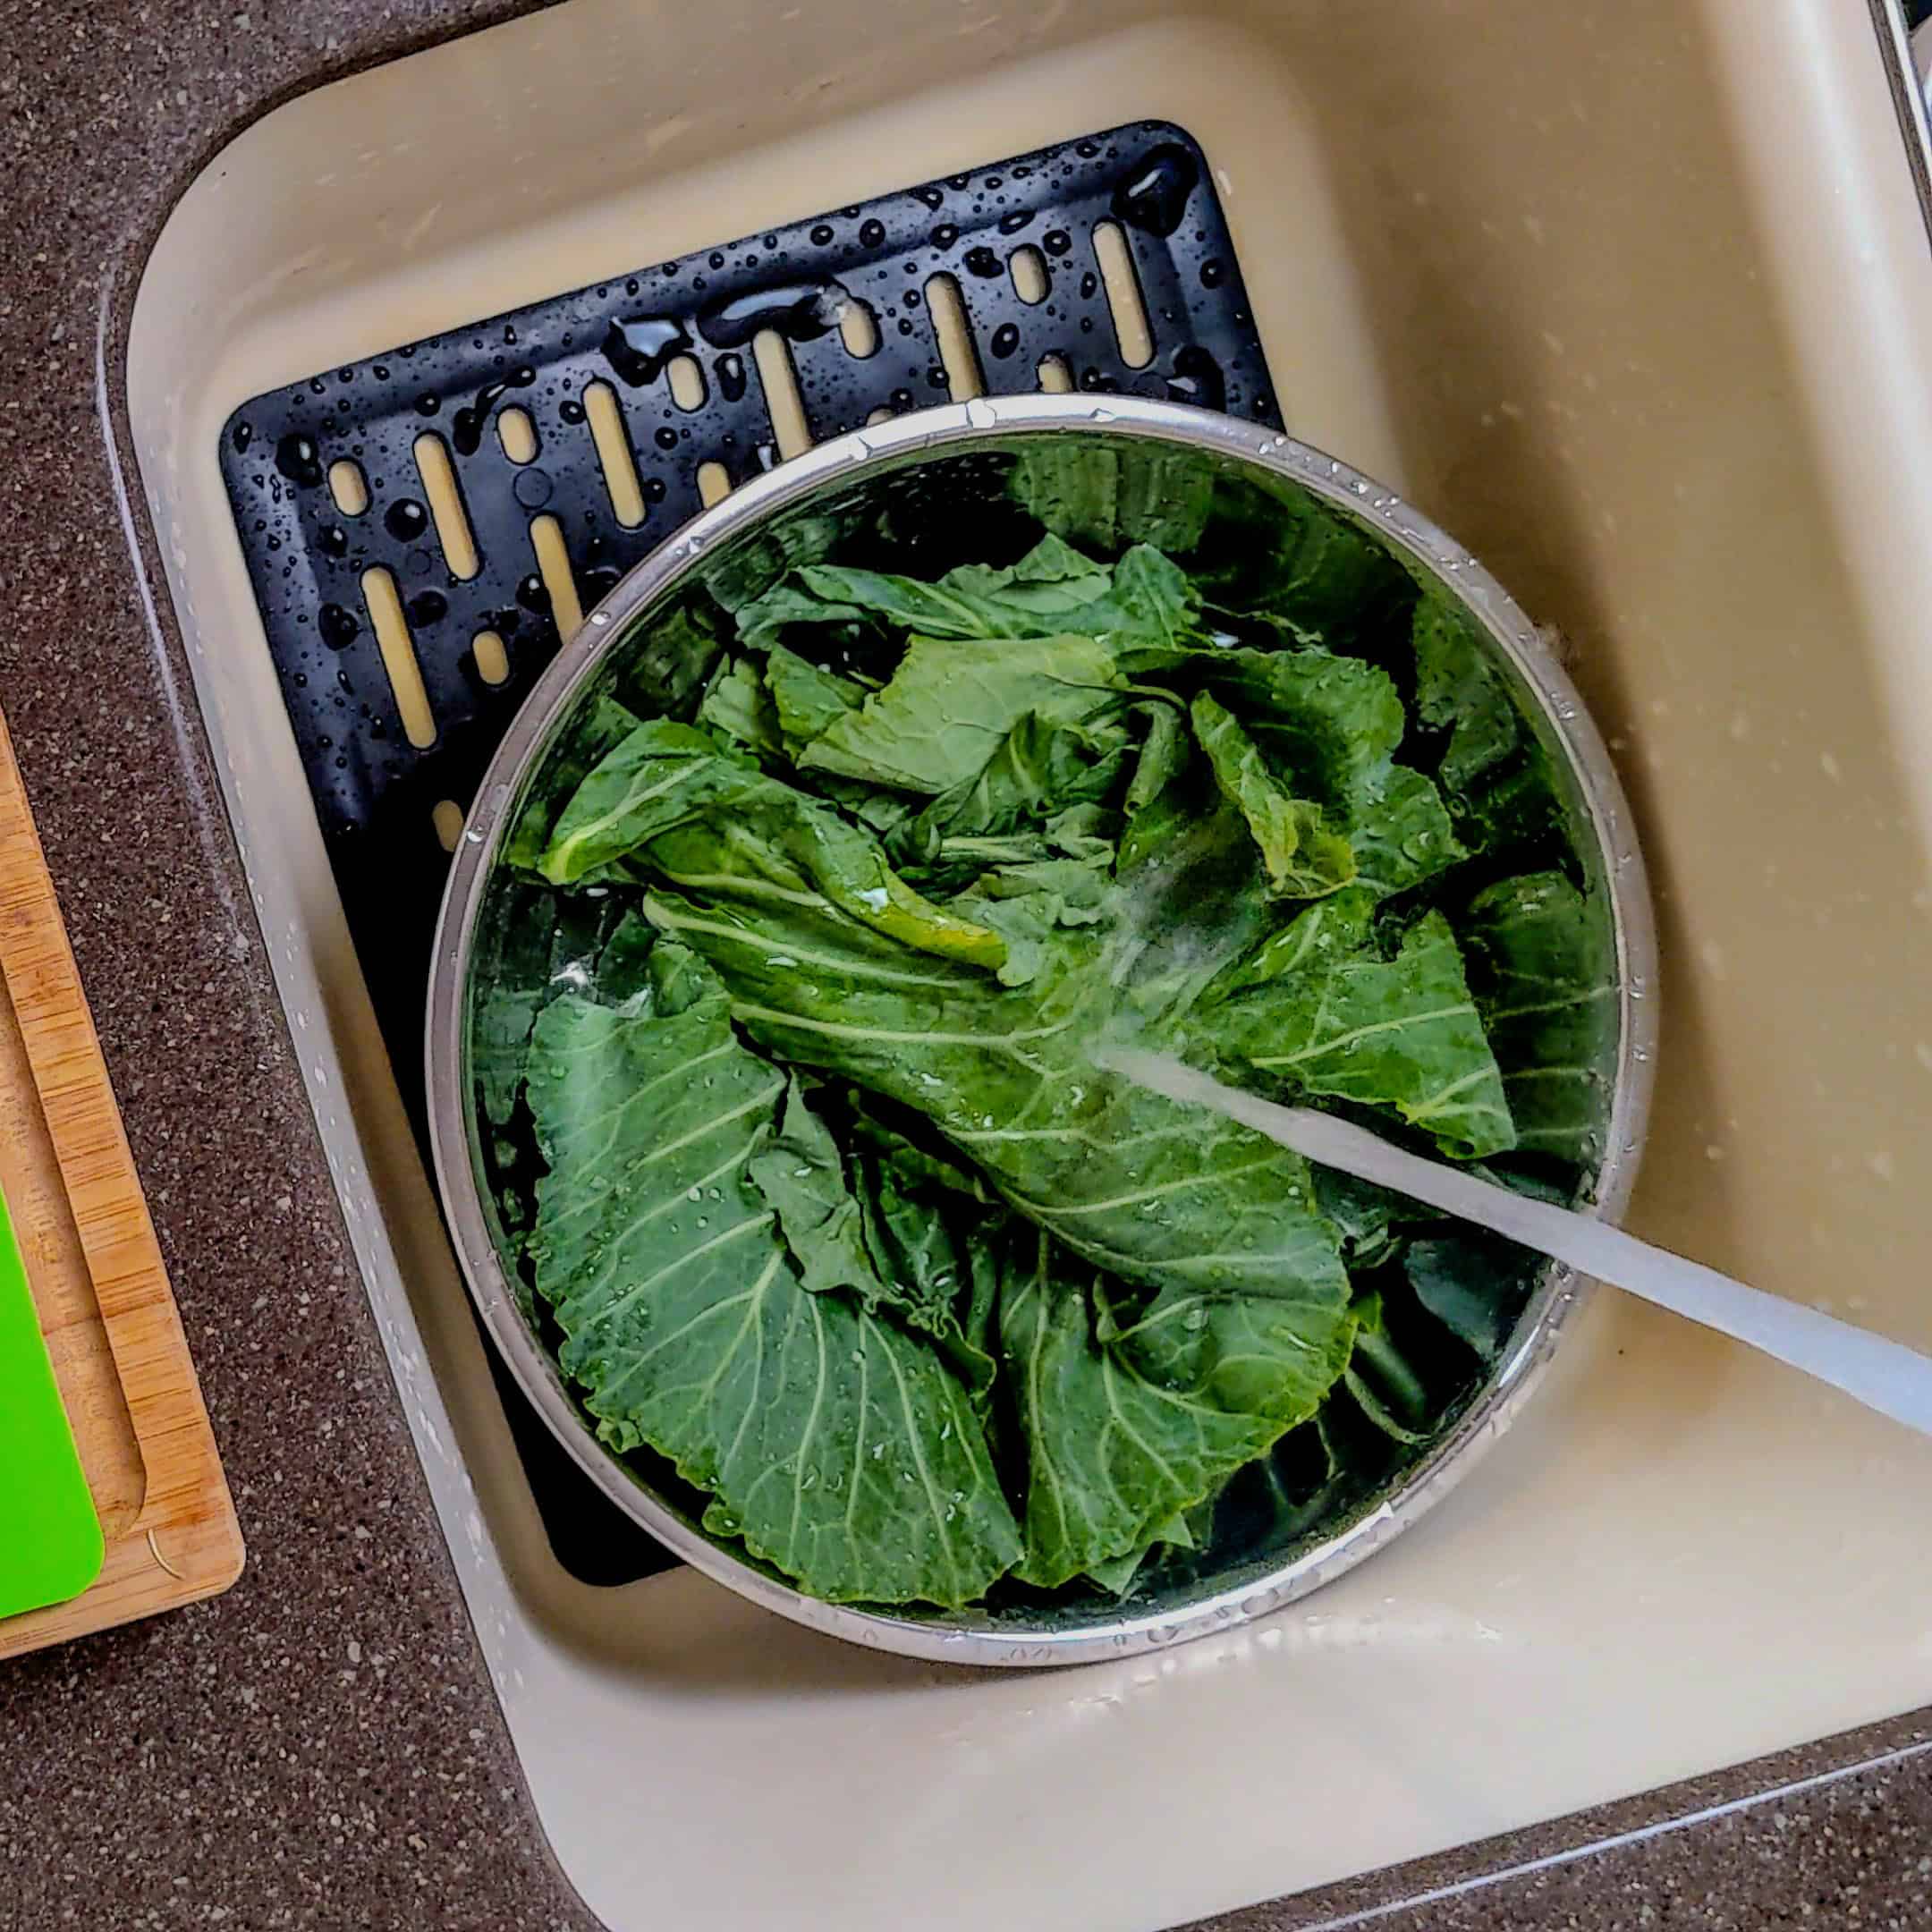
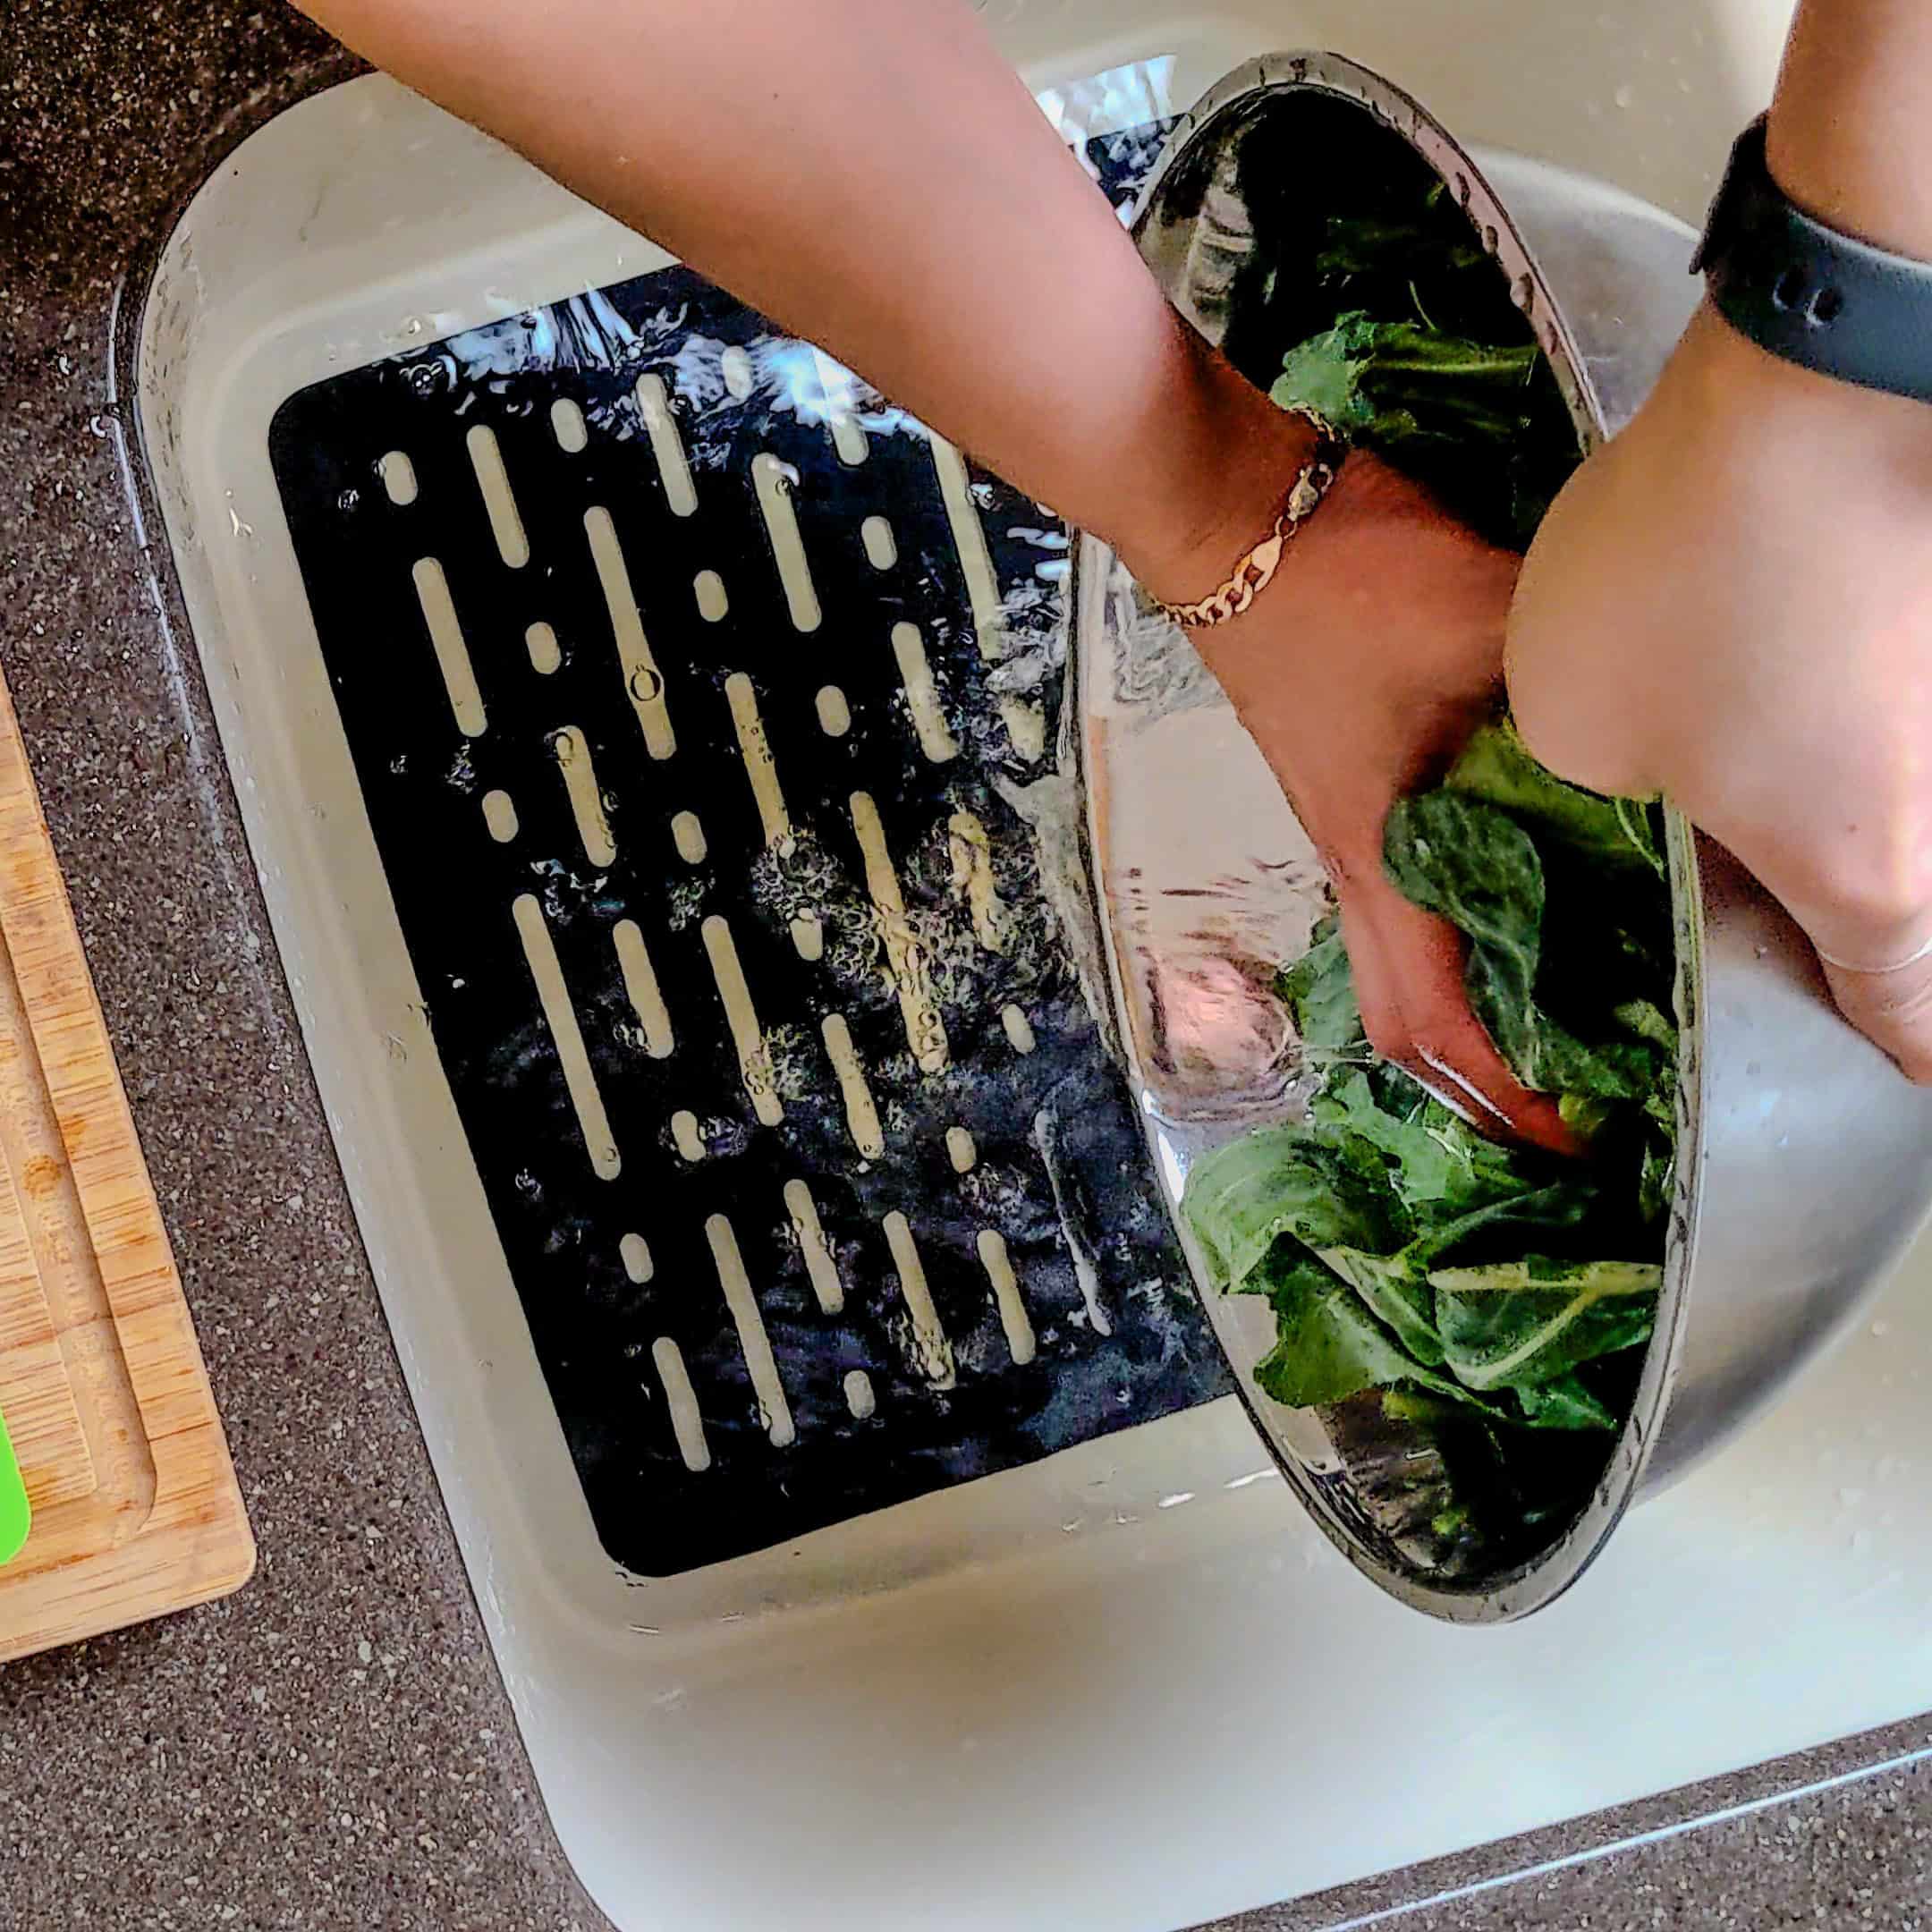
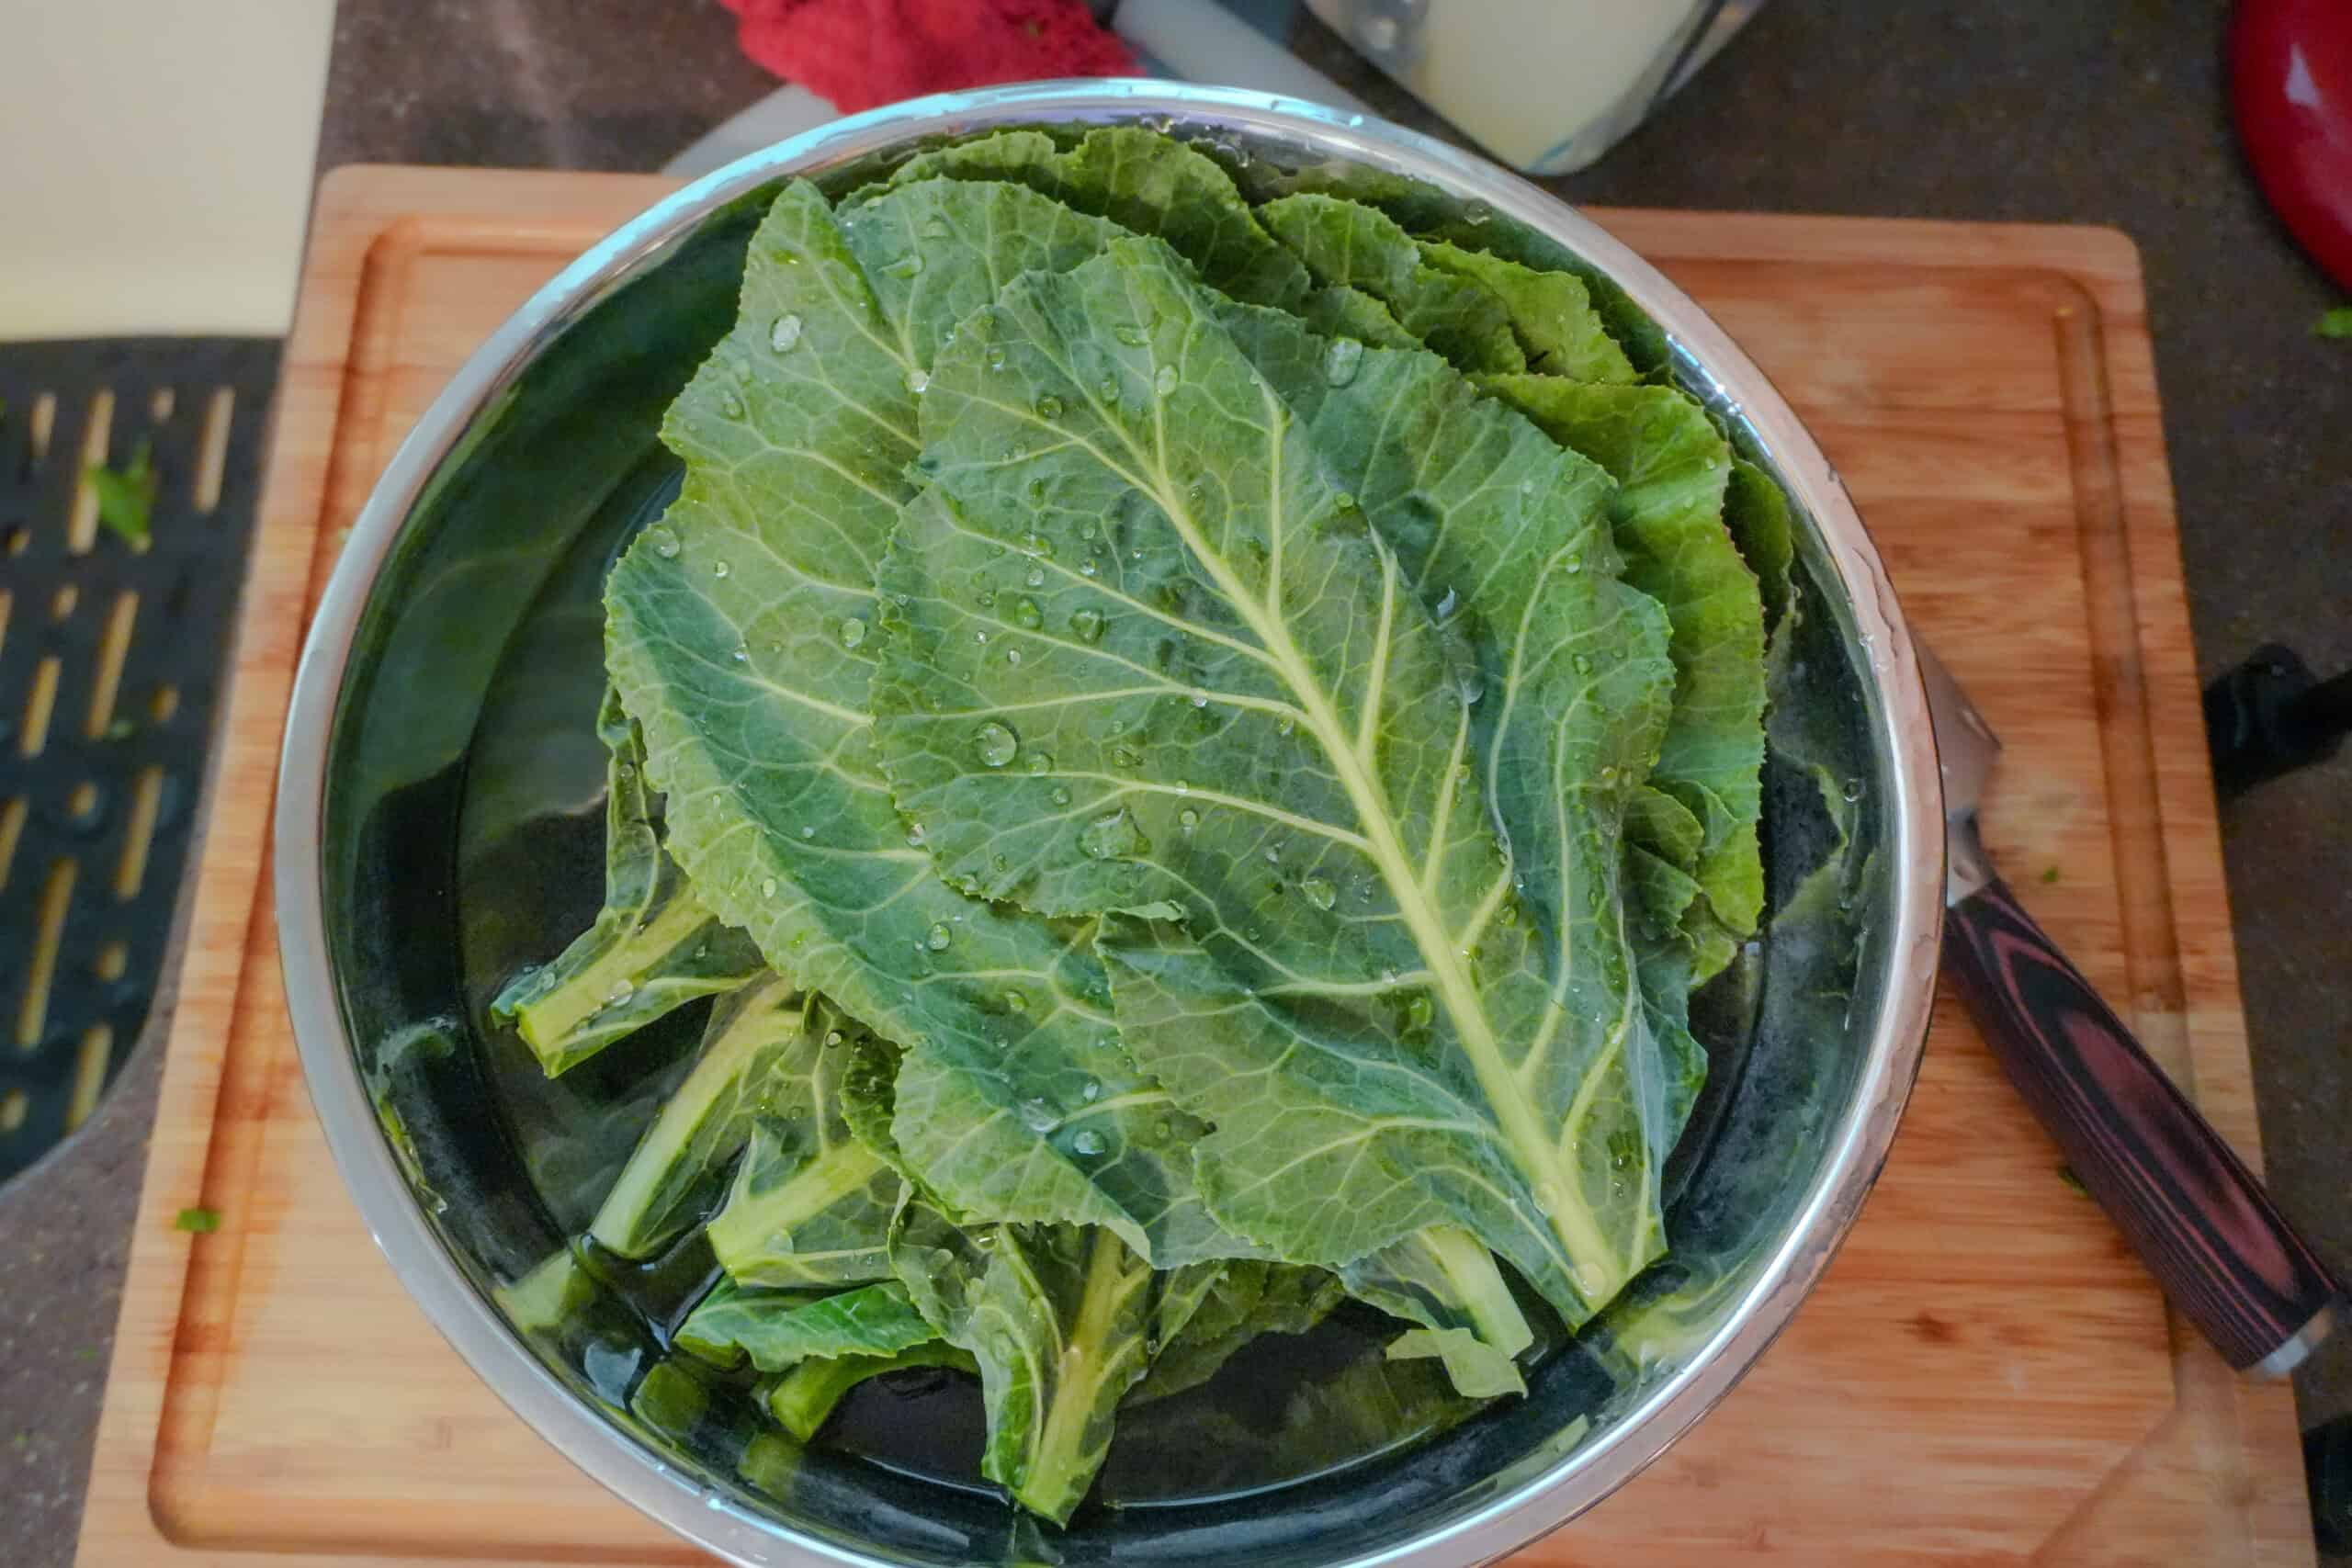
Fill a large bowl or clean sink with cold water. Soaking helps loosen grit, especially from the folds of the leaves.
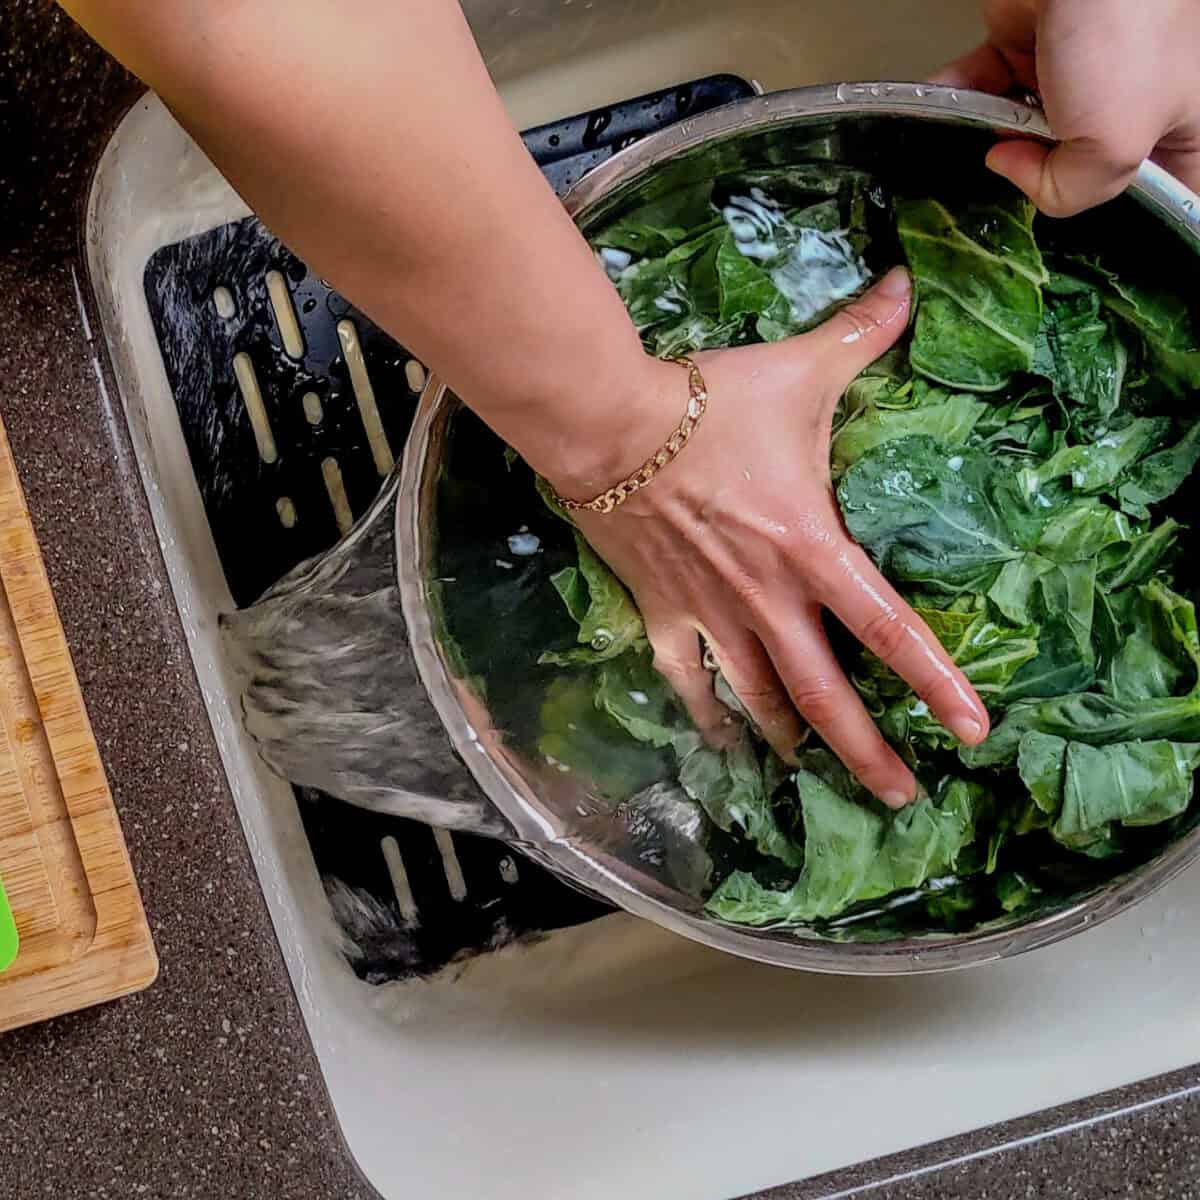
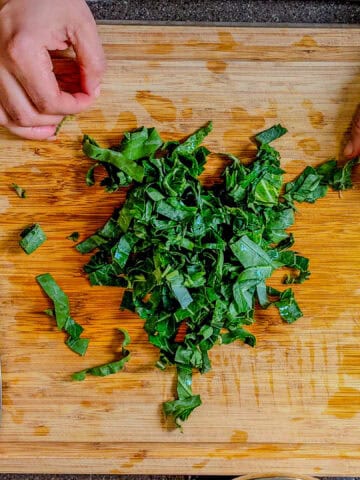
Swish the greens gently with your hands.
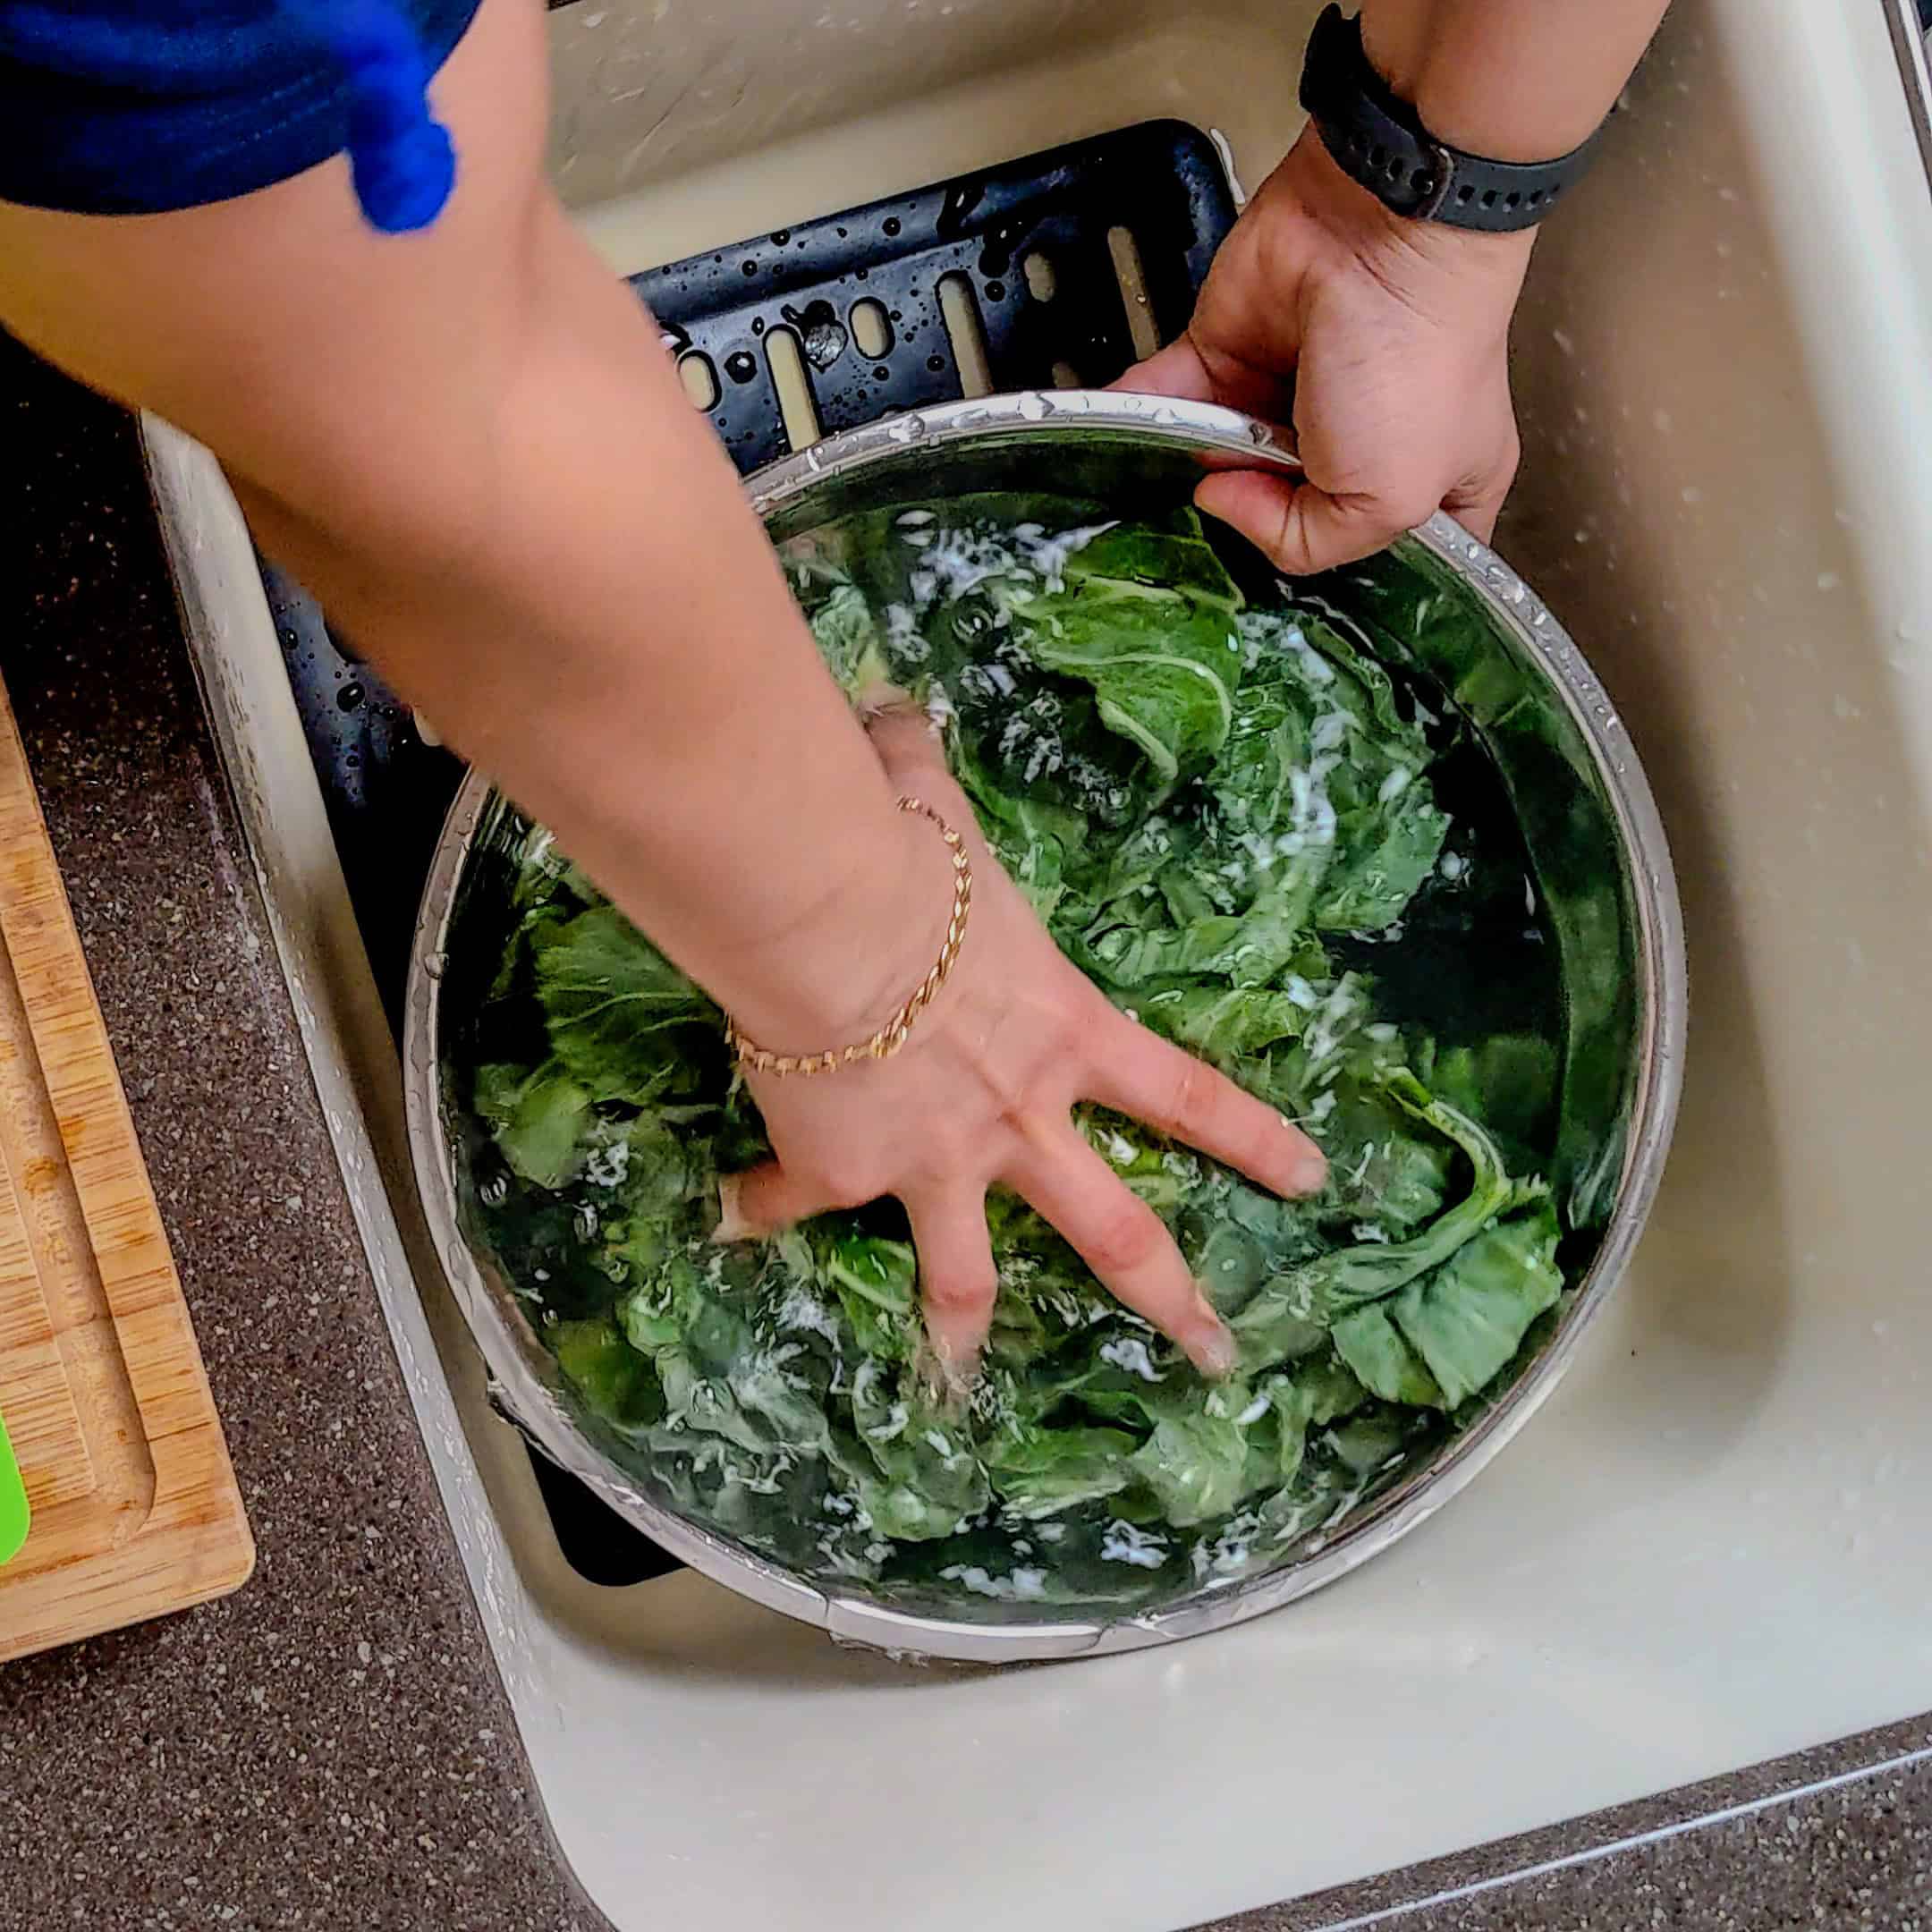
Get under those fanlike leaves—dirt loves to hide in there!

You can also lift the greens out of the water instead of pouring the water out. This keeps the grit at the bottom of the bowl instead of re-coating your greens.
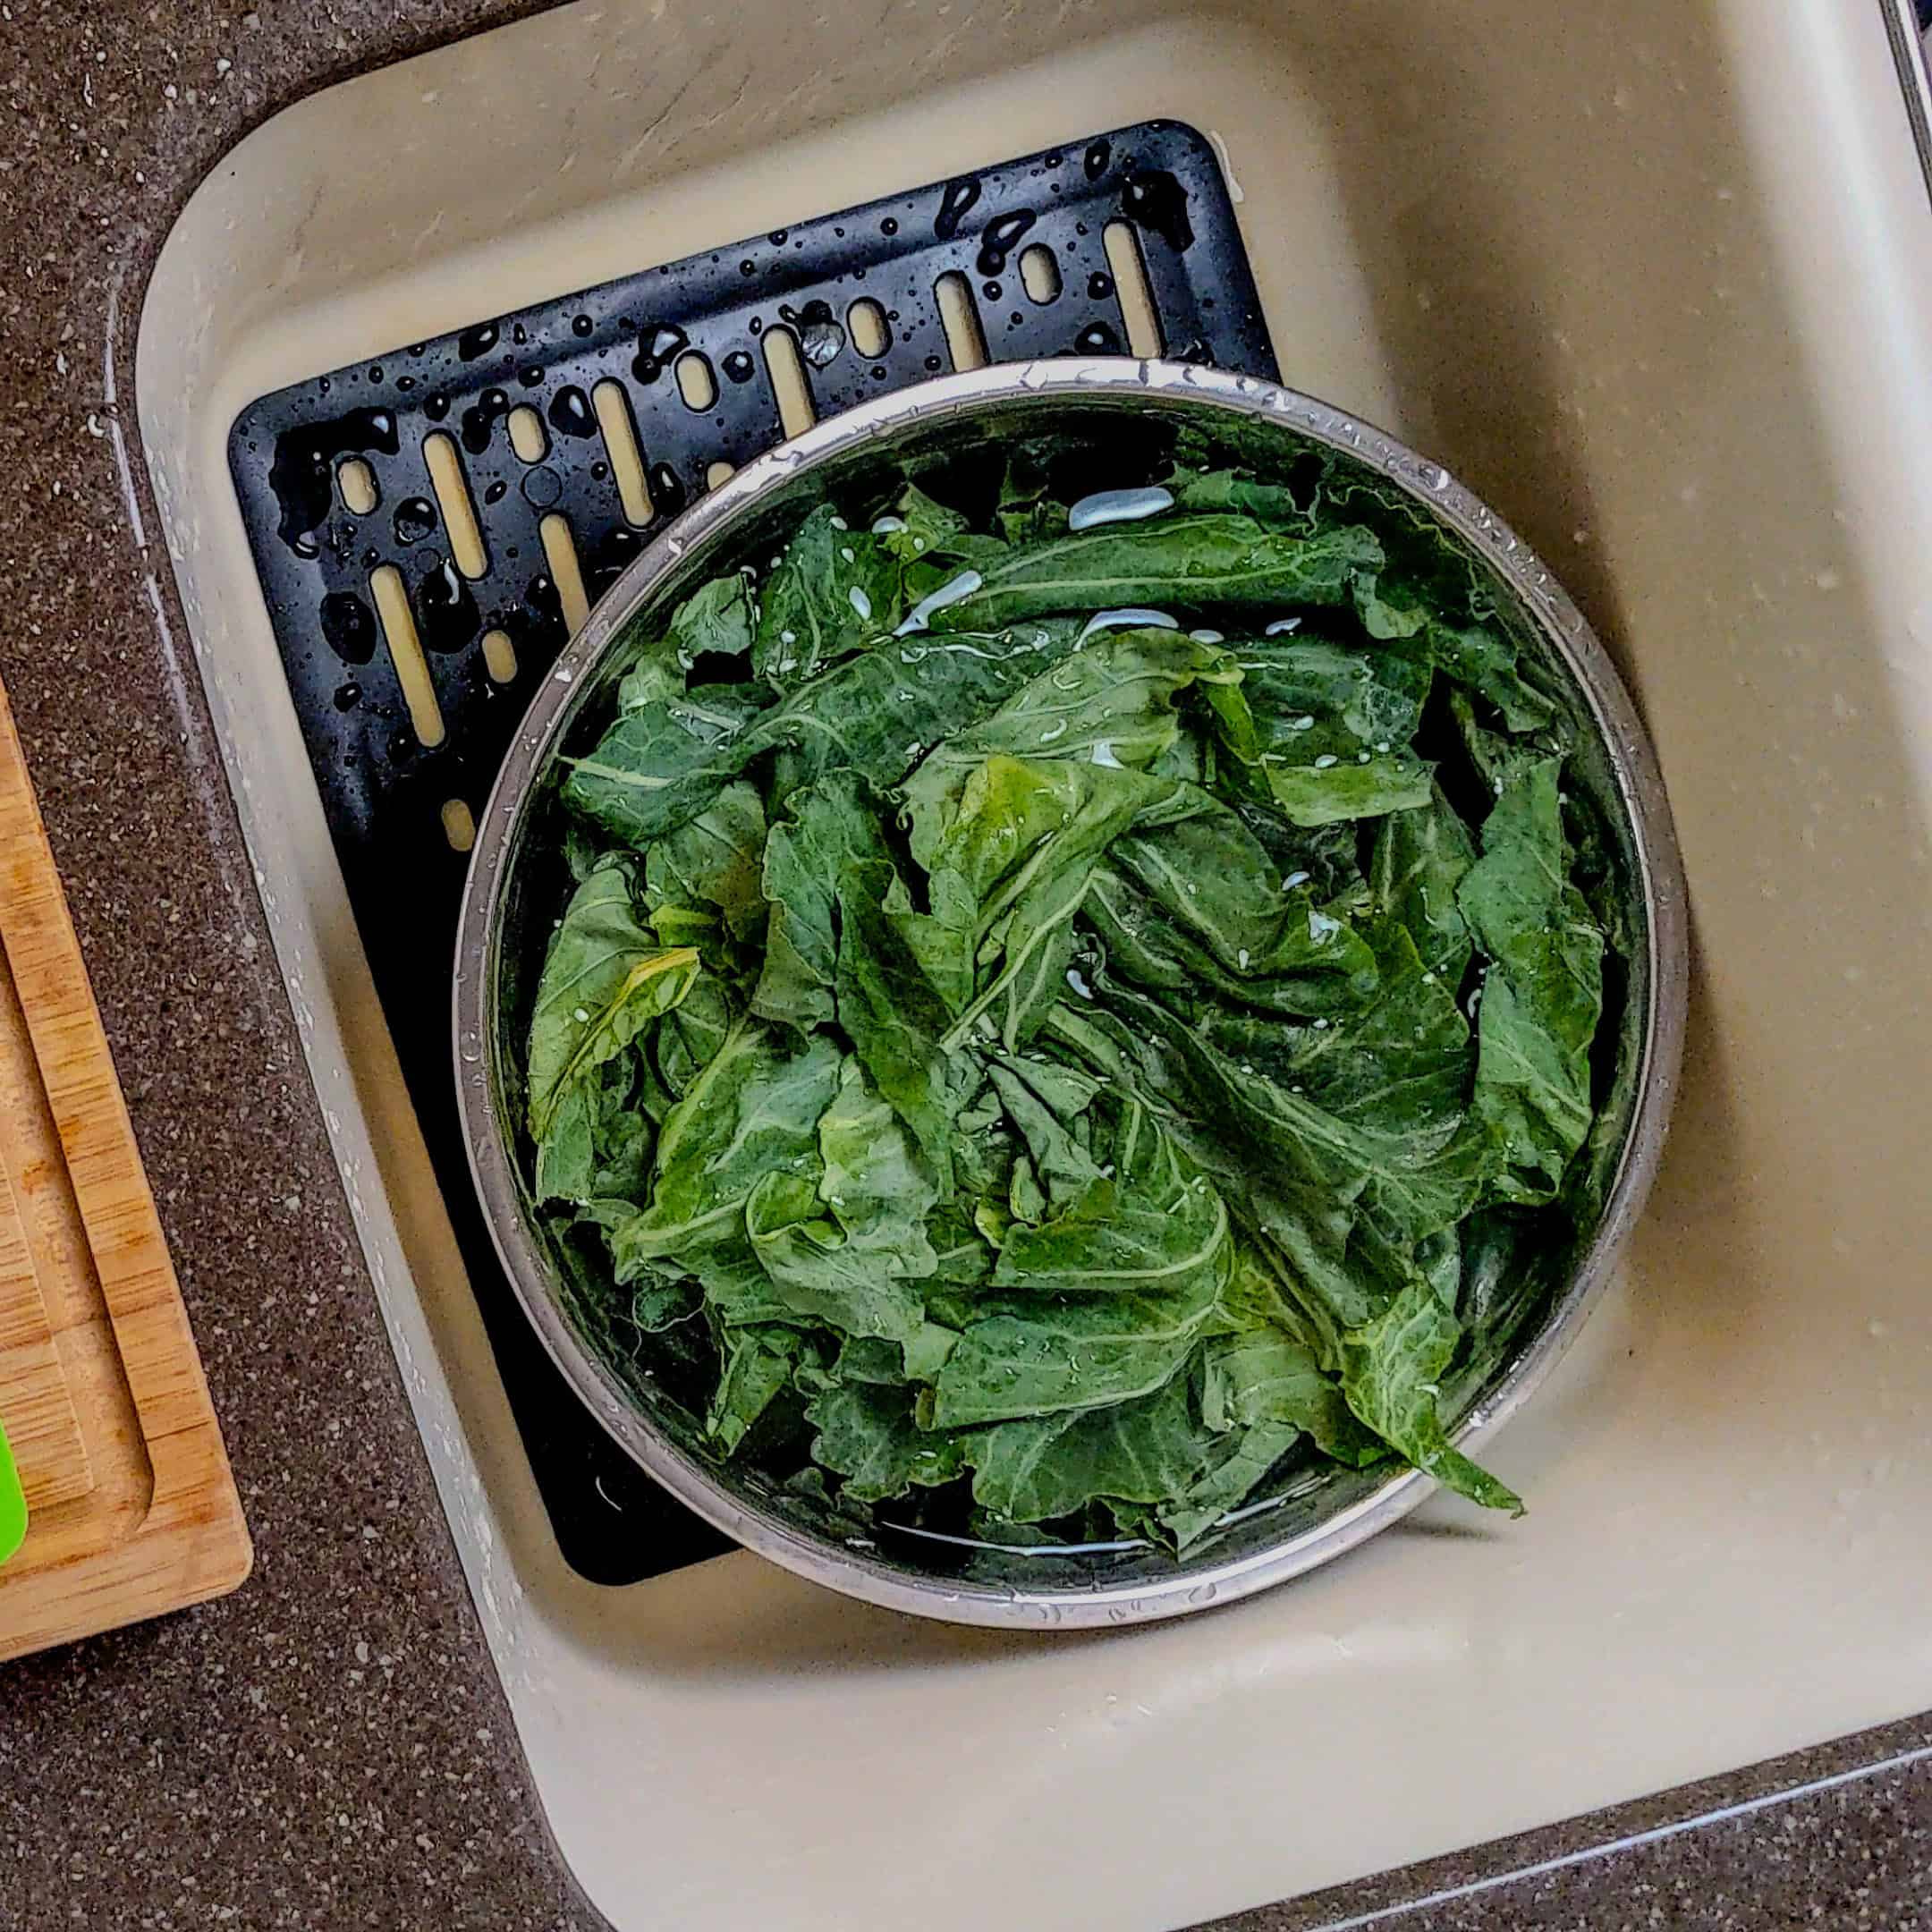
Repeat the soak-and-swish process 2–3 times until the water runs clear. If it’s your first time, go for three rounds—better safe than sandy.
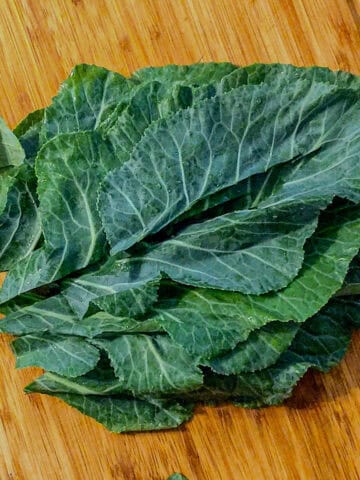
Pat the leaves dry with a paper towel or clean kitchen towel. Dry leaves are easier to trim and safer to slice—less slip, more control.
Adding Vinegar
I noticed in some instructions that some people used vinegar to clean collard greens. And this is what I learned. Many home cooks, particularly in the Southern United States, add a splash of white vinegar or apple cider vinegar to the water when soaking the greens.
The idea is that vinegar helps loosen any remaining dirt, kill surface bacteria, and even coax out any tiny bugs that might be hiding in the thick central ribs or folds of the leaves which totally makes sense.
A Peace of Mind
While it’s not absolutely necessary, using vinegar can offer peace of mind—especially if you bought your bunch of collard greens from a farmers market or they weren’t pre-washed. Just a tablespoon or two in a bowl of cold water is enough to help clean collards without affecting their taste.
Chef Tip: Always follow up with a few rinses in clean water to remove any vinegar residue before drying and trimming your greens.
Equipment
Before you start washing your greens, make sure you have the right tools on hand. These basic kitchen items will make the process easier, and more efficient and help you avoid making a mess in the process. Don’t worry—no fancy gadgets are required, just a few reliable essentials.
1. Large Bowl or Clean Sink
A large mixing bowl or clean kitchen sink is essential for soaking your bunch of collard greens. Because these greens often come packed with grit, dirt, and debris, you’ll need plenty of space to fully submerge and swish the leaves around in cold water.
The bigger the bowl, the better the soak—and that’s the first step toward clean collards with no surprises in your pot. If you're using the sink, make sure it’s been scrubbed clean beforehand, and consider using a small amount of white vinegar or apple cider vinegar in your first soak.
2. Paper Towels or a Clean Kitchen Towel
After rinsing, you’ll need to dry your fresh greens to remove excess moisture before trimming and slicing. A stack of paper towels works great for blotting water from the leaves, while a clean kitchen towel is a more sustainable, reusable option.
Either one helps keep the greens from slipping around on your cutting board, making it safer when using a sharp knife. Wet greens are harder to handle, and dampness can water down your seasoning later—so don’t skip this drying step.
3. Colander (Optional, But Helpful)
A colander isn’t strictly necessary, but it’s definitely useful. After soaking, you can dump your greens into the colander to drain off the water and free up your bowl for the next rinse. It also helps with giving your greens one last good rinse under running water.
If you don’t have a colander, use your hands to lift the greens out of the water between soaks to prevent the dirt from resettling on the leaves.
Kitchen Must Haves - Find other tools I use here.
My Rating: ⭐⭐⭐⭐
Purchased: December 10, 2023
My Review: I love the clean, classic look of this Pyrex 3-piece glass mixing bowl set—it’s a staple in my kitchen. Pyrex is known for its durability, and these bowls definitely live up to that reputation. I use them for everything from mixing batters to storing leftovers, and the fact that they’re microwave-safe makes them super multifunctional. They’re also easy to clean and stack nicely in the cabinet. The only reason this isn’t a five-star for me is because I always have that little fear of breaking them when I’m using or storing them, even though they’re made to last.
Storing After Prep
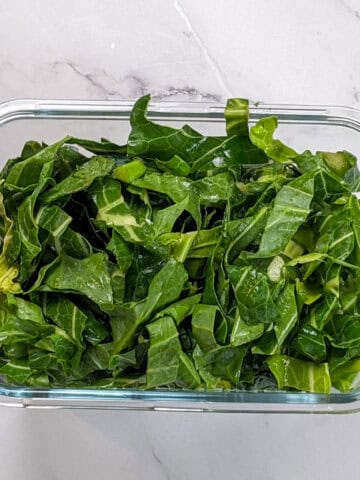
Once your collard greens have been thoroughly washed and dried, but you’re not ready to cook them right away, proper storage is key to keeping them fresh. Wrap the clean collard leaves loosely in a moist paper towel to maintain just the right amount of humidity, then place them in a resealable plastic bag or airtight container.
Store them in the crisper drawer of your refrigerator, where they’ll stay fresh for up to 5 days. Avoid sealing in too much moisture, which can cause wilting or spoilage—your goal is to keep the fresh greens cool, hydrated, and breathable until you're ready to finish the cooking process.
My Rating: ⭐⭐⭐⭐⭐
Purchased: April 07, 2024
My Review: I absolutely love these 5-pack fruit storage containers—they completely exceeded my expectations! I was truly surprised at how long they kept my produce fresh, especially delicate items like berries and lettuce that usually spoil quickly. The removable colanders are super convenient for rinsing and draining right in the container, and the leakproof lids make fridge organization a breeze. I was so impressed with how well they worked, I went ahead and bought three packs! These have definitely become a go-to in my kitchen for keeping fruits, veggies, and even prepped meats fresher for longer.
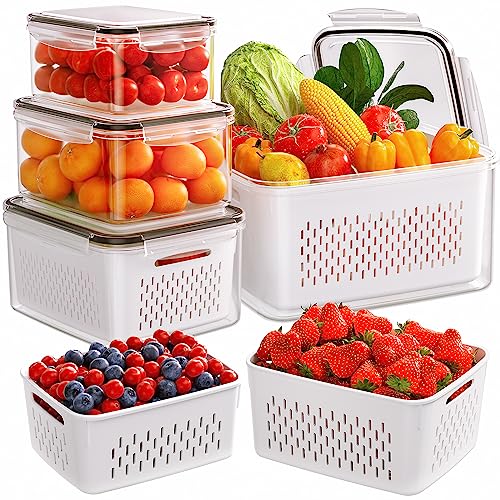
Airtight Food Containers - I interchange glass food storage containers with plastic clipping lids or wooden push-ins. I always suggest glass storage containers because they can be microwaved, they hold food without staining, and the glass keeps the food at a more stable temperature, keeping it fresher and longer.
Try the OXO Good Grips Smart Seal Glass Rectangle Food Storage Containers or the Pyrex Freshlock Glass Food Storage Containers.
Prepping Tips Recap
These tried-and-true tips will make the cleaning process smoother, safer, and more effective—especially if you're new to prepping hearty leafy greens like collards. Also, Cook's Notebook is your Cooking Tips Resource Guide. Become a better home cook with tips to help you cook more efficiently.
1. Soak, Don’t Just Rinse
A quick pass under the faucet might work for a pre-washed salad mix, but it’s not enough for collard greens. These thick, textured leaves grow low to the ground and are known for trapping sand, grit, and other surprises in all the folds and creases—especially along the prominent veins.
Soaking the greens in a bowl of cold water (or a clean sink) for a few minutes lets the dirt loosen naturally. Swish gently, then lift the leaves out so the grit settles to the bottom. Repeat 2–3 times for best results.
2. No Need to Add Vinegar or Salt (Unless You Want To)
You might hear folks swear by white vinegar or apple cider vinegar in their soak water—and while that can help remove surface bacteria or encourage tiny bugs to float out, it’s not mandatory. In most cases, cold clean water alone is enough to give your greens a proper good rinse.
If you do add vinegar, keep it light (just a splash), and rinse thoroughly afterward to avoid any lingering acidity on your fresh greens.
3. Wash Before Trimming
Don’t trim first—wash the full leaves while they’re intact. Handling the full leaf keeps things easier to manage during the wash phase. Once the greens are cut or torn, they can tangle, making it harder to swish them clean.
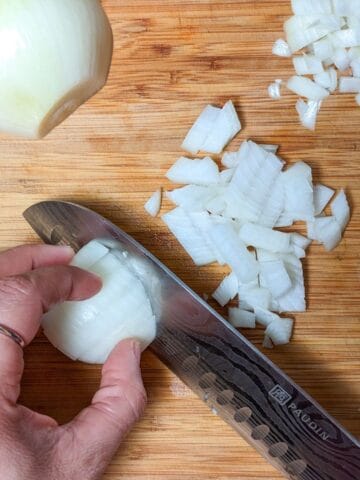
Washing first also prevents water from pooling inside sliced edges, which can affect both the drying process and storage later. Trim the tough stem and slice your collard leaves after they’re dry and dirt-free—it’s not only more effective, but it’s safer for your fingers when working on a damp cutting board with a sharp knife.
Frequently Asked Questions
Here, you will find a list of common questions that I have answered. If you have questions, please write them in the comment section below.
Yes—always. Even if your collards look clean or were labeled “pre-washed,” don’t skip this step. Collard greens grow low to the ground, which means they naturally collect dirt, sand, and sometimes even tiny insects.
Because of their textured surface and thick central ribs, that grit can easily get trapped in folds and creases, and no one wants gritty greens ruining a good pot of southern collard greens. Cleaning is a crucial step in making sure your dish is all flavor and zero surprises.
Wash your collard greens at least two to three times, or until the water runs clear. Start by soaking them in a bowl of cold water, swishing the leaves around gently to loosen up any hidden debris.
After each soak, lift the greens out instead of dumping the water—that helps keep the grit at the bottom. If you're dealing with especially dirty greens (common from farmers markets), don’t be afraid to give them a fourth soak.
Yes, and it’s actually a great time-saver. Once your fresh greens are clean and completely dry, wrap them loosely in a moist paper towel and place them in a resealable bag or airtight container. Store them in the crisper drawer of your fridge, and they’ll stay fresh for up to 5 days.
Just make sure they’re fully dried before storing—excess moisture can lead to spoilage or soggy greens later when you're ready to cook.
It’s totally optional, but some cooks swear by it. A splash of white vinegar or apple cider vinegar in the first rinse can help remove surface bacteria or flush out hidden bugs, especially if you're cleaning a bunch of collard greens fresh from a farm or backyard garden.
Just be sure to rinse again with clean water afterward to remove any vinegar flavor. It’s not necessary for cleanliness, but it can offer peace of mind—especially if you're prepping for a New Year's Day or holiday meal.
Yes, a salad spinner can be a lifesaver! After soaking and rinsing your collard leaves, spin them in small batches to get rid of excess moisture quickly and evenly.
This is especially helpful if you're planning to store the greens for later or prep a large batch. If you don’t have one, gently pat the leaves dry with paper towels or a clean kitchen towel—just make sure they’re completely dry before you trim or slice on your cutting board with a sharp knife.
Cook's Notebook
Learn new ingredients, techniques and equipment through cooking tips and tricks in my Cook's Notebook. From beginner-friendly advice to advanced techniques.
- How to Wash Fresh Herbs the Right Way Before Use
- How to Prep Collard Greens: Complete Beginner’s Guide
- Best Collard Greens Substitutes: 7 Leafy Greens
- How to Store Collard Greens | Fridge & Freezer Guide
Trending Recipes
Stay up to date on the best recipes perfect for the season and your belly!
- 20 Irresistible Fish Recipes
- Green Seasoning Recipe | Epis - Haitian Style
- Quick Spicy Potstickers | Chili Momo Tibetan Style
- Beituti Chicken Shawarma Rice Bowl | Quick and Easy


Subscribe to the YouTube Channel
SUBSCRIBE: 👈To my YouTube Channel to Get Notifications of New Videos.


Chef Maika Frederic
Personal Chef and Educator
Chef Maika is a Haitian-American personal chef, food blogger, and culinary expert passionate about bold flavors and approachable recipes. Owner of Growth Culinary and with years of experience in top kitchens, she shares diverse, flavorful meals and time-saving tips to inspire home cooks. Read More About Just Maika Cooking
Have a Comment or Question?
If you have a question or comment about this post, please post it below. You will definitely get a quick response. It also helps our other readers to stay informed. Thanks!

Leave a Reply